 How to set up Campaigns?
# How to set up Campaigns?
Now you know about what Campaign is and get itchy feet to have a try. Let’s get started!
What this article covers:
- Real-time Campaign
- Normal Campaign
- How to apply for the whitelist member to create Campaigns?
- How to publish normal Campaigns?
- How to finish and claim normal Campaigns?
Real-time Campaign
The first thing that comes to your sight is the real-time campaign. Real-time campaigns are any ongoing activities in certain capsules e.g. AMAs that are open to everyone and can be found in the public traffic domain, which are ranked according to real-time views.
If you don’t want your ongoing activities displayed in the real-time Campaign, just follow the steps to set it up.
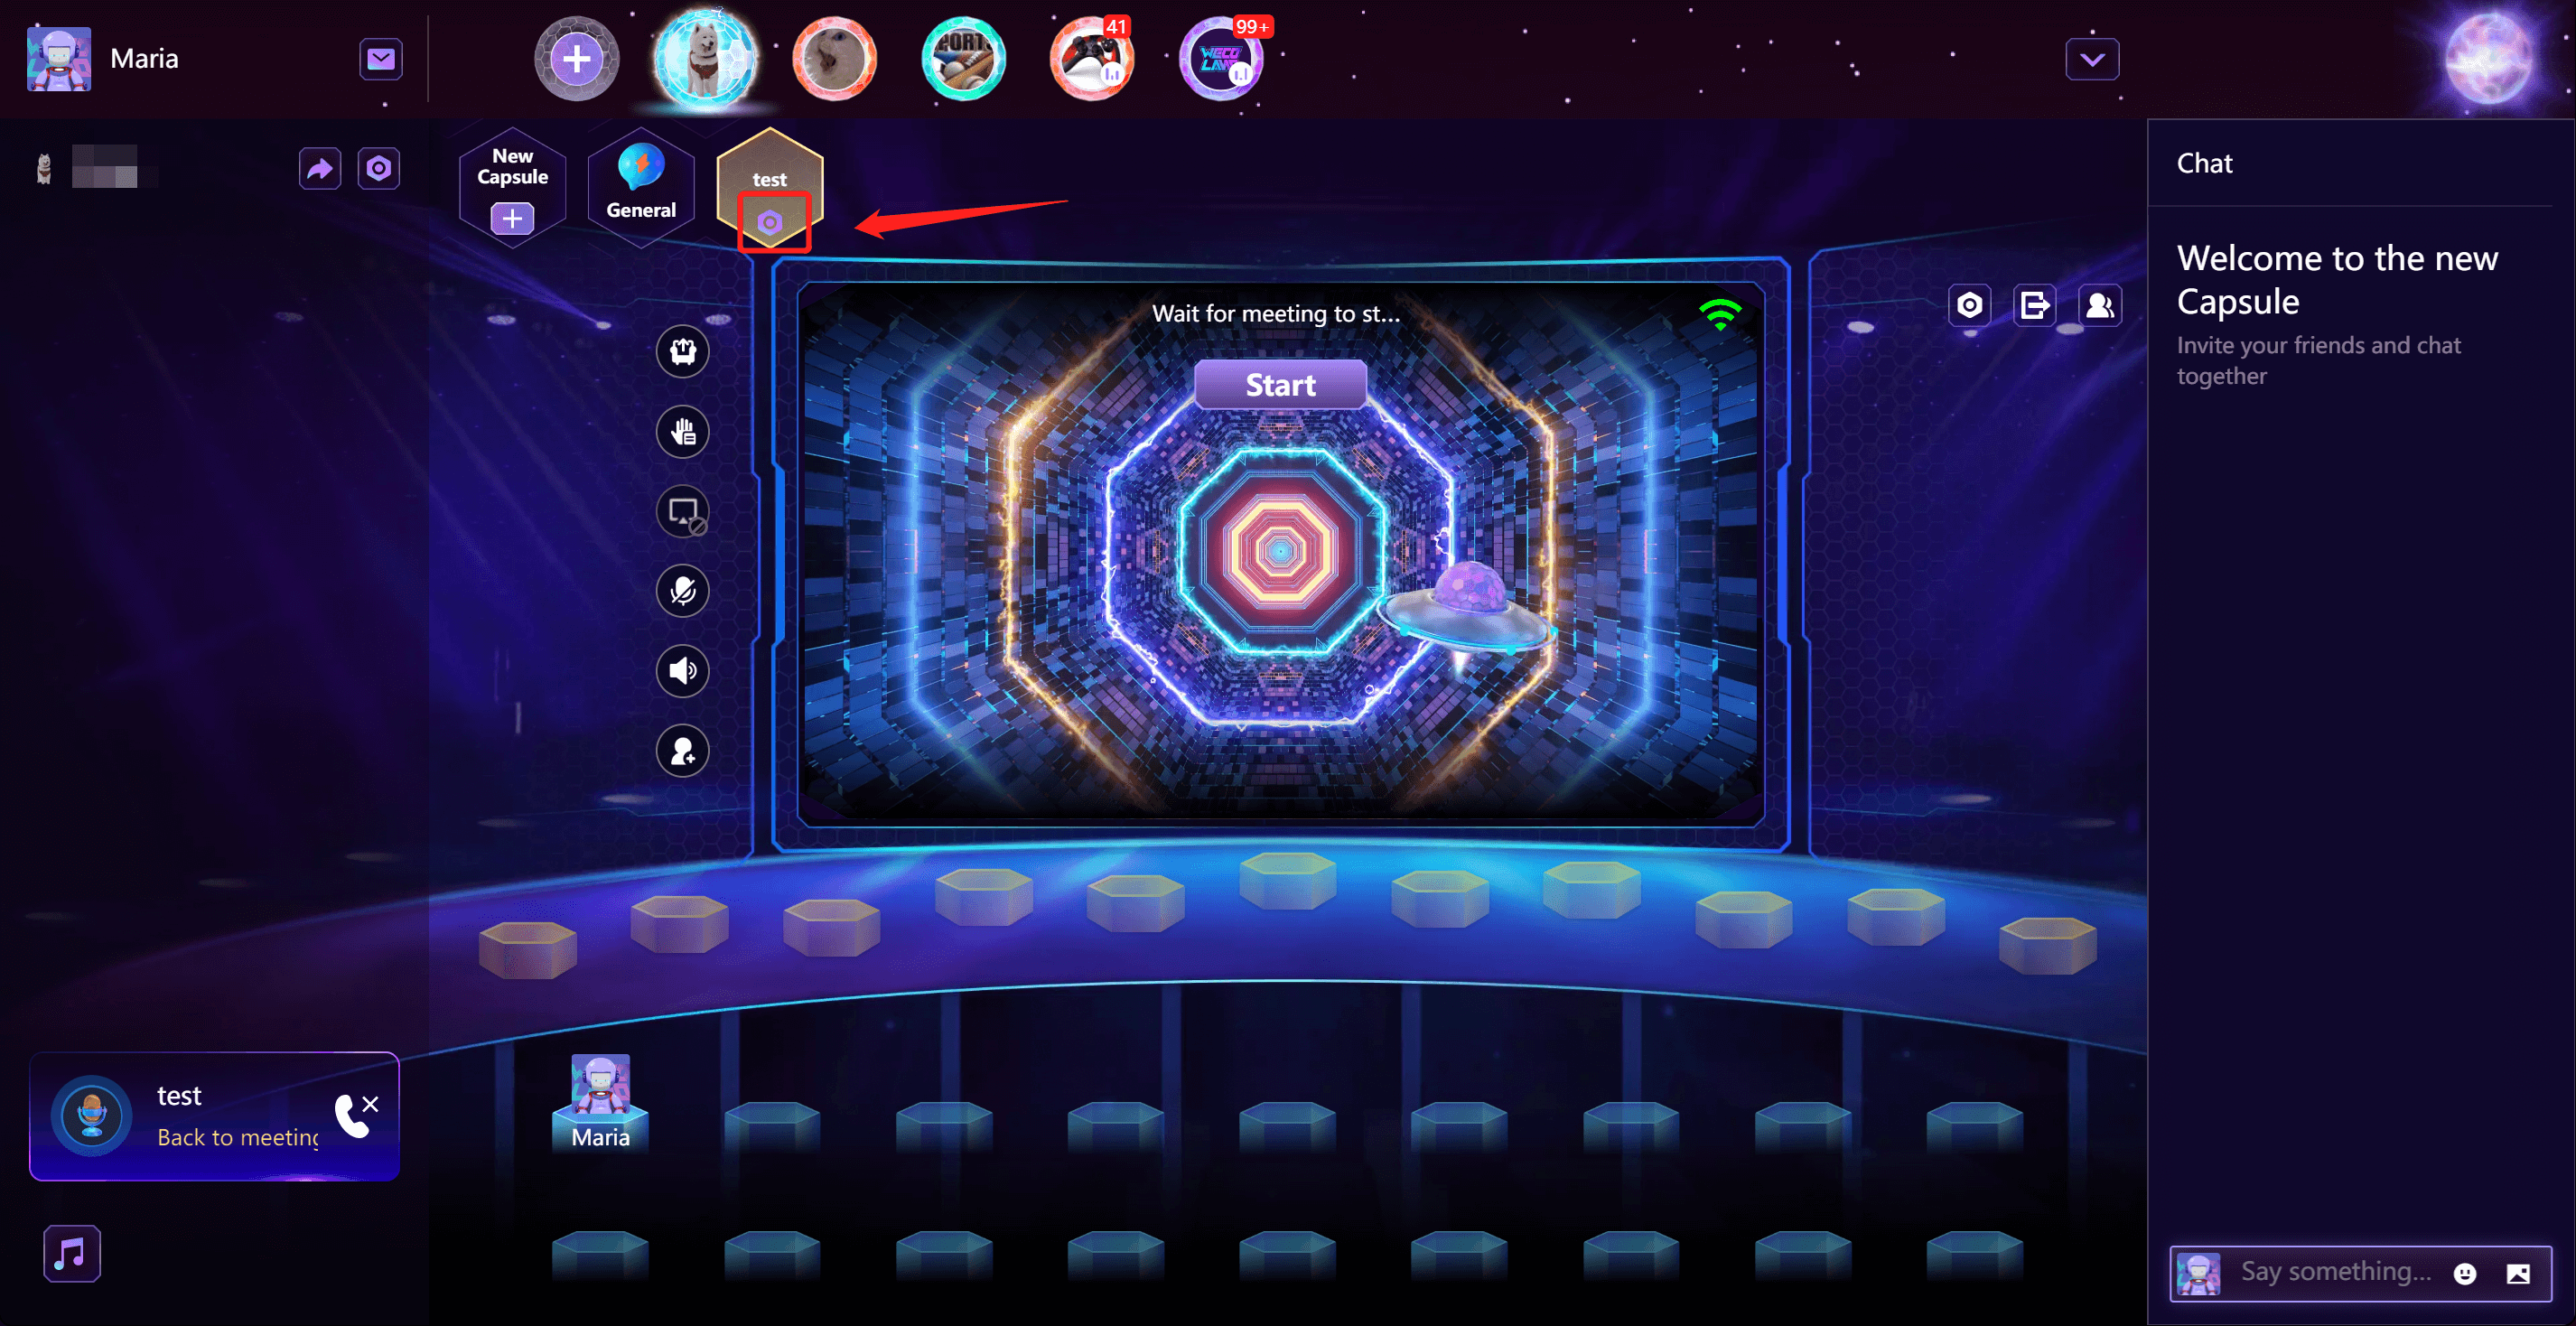
Step 1: tap on the icon of a gear displayed on the Capsule as shown in th pic below to find the page of “Capsule Settings”.
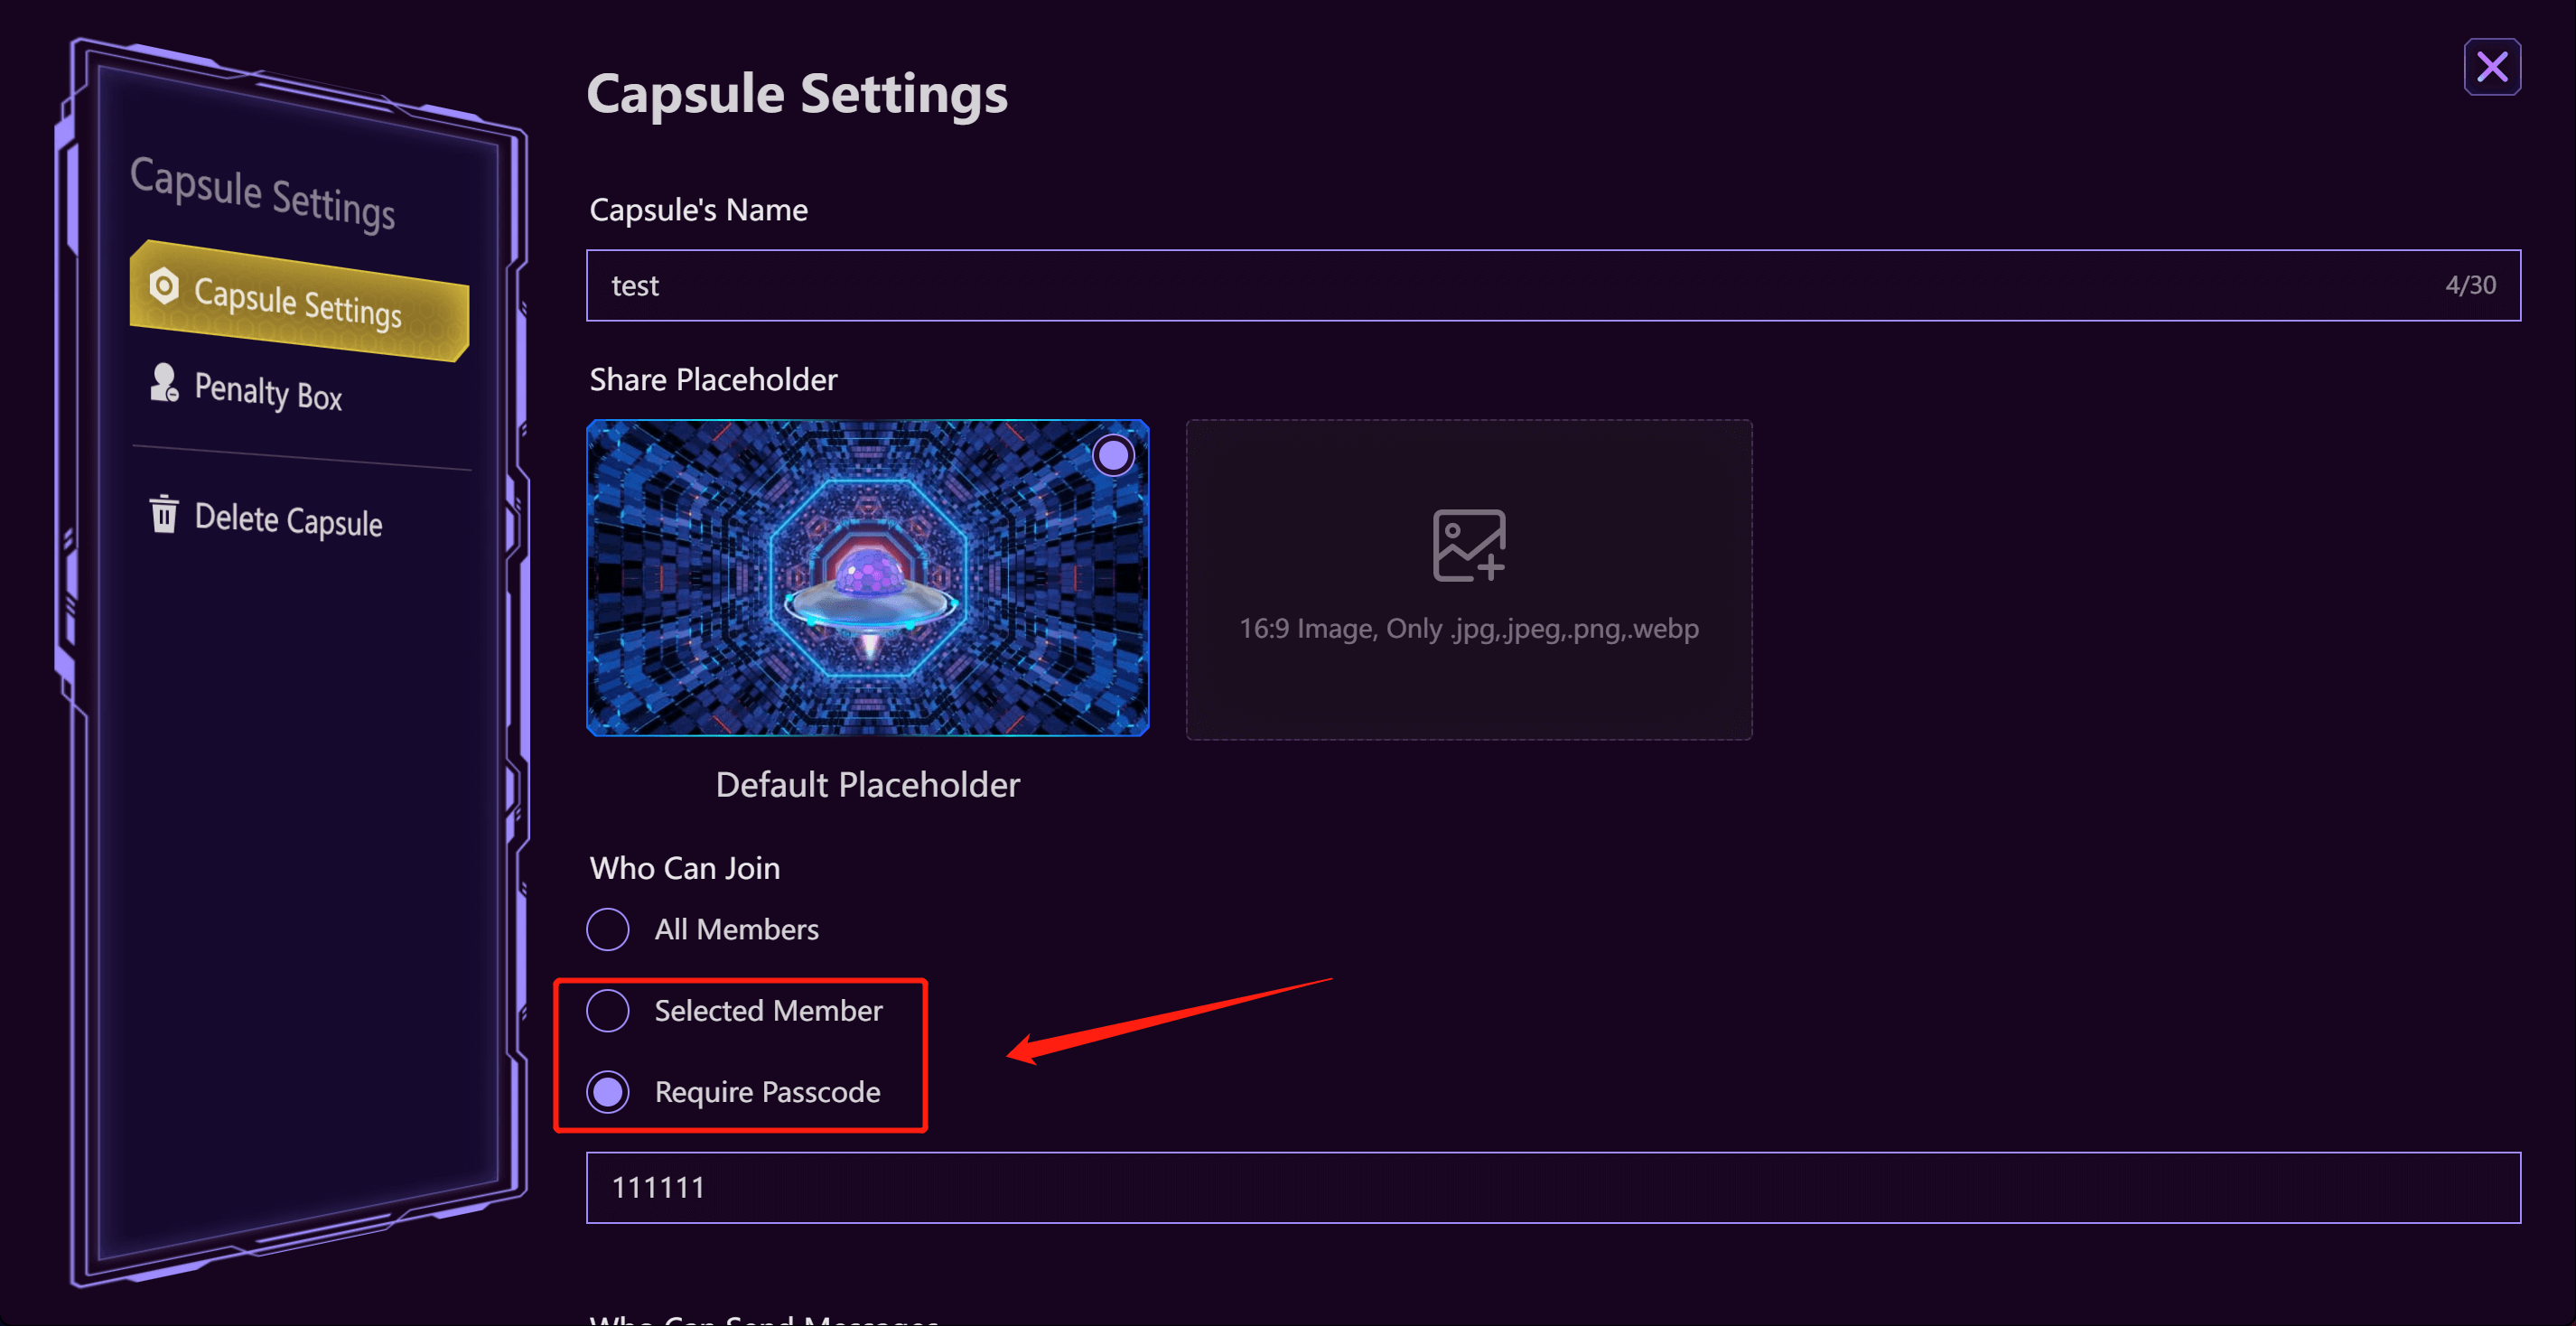
Step 2: on the page of “Capsule Settings”, you can go to “Who Can Join” to make this Capsule private. You can choose select members to join or set up a passcode for members to join. You can always change it back to “All Members” to drive more traffic to your Capsule through the feature of real-time Campaign.
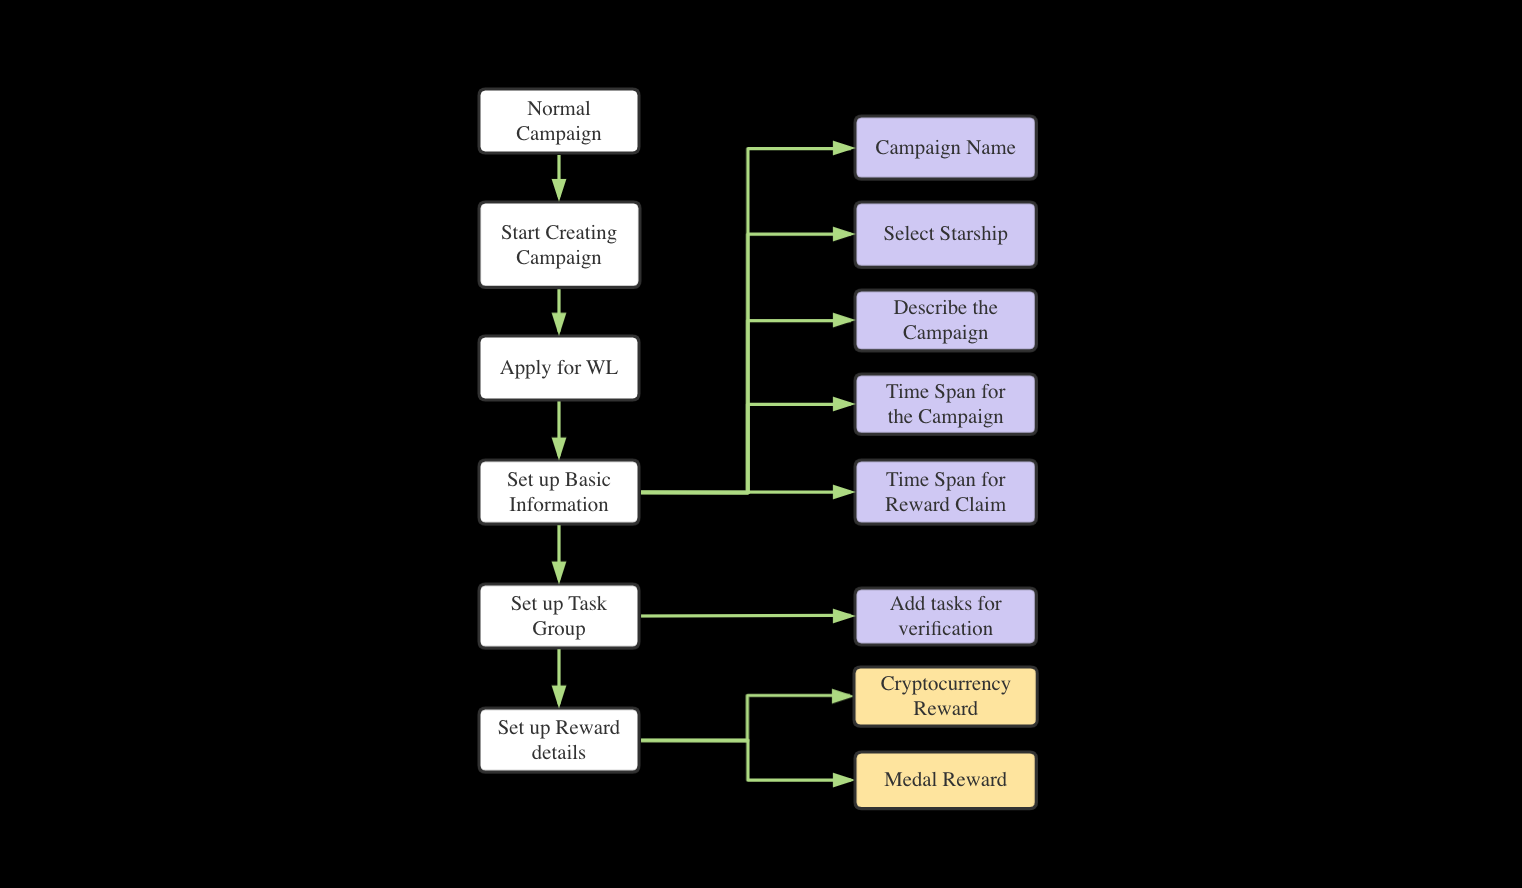
Now this is a general mind flow for you to explore about normal Campaigns. Wanna know more details, keep on reading.
How to apply for the whitelist member to create Campaigns?
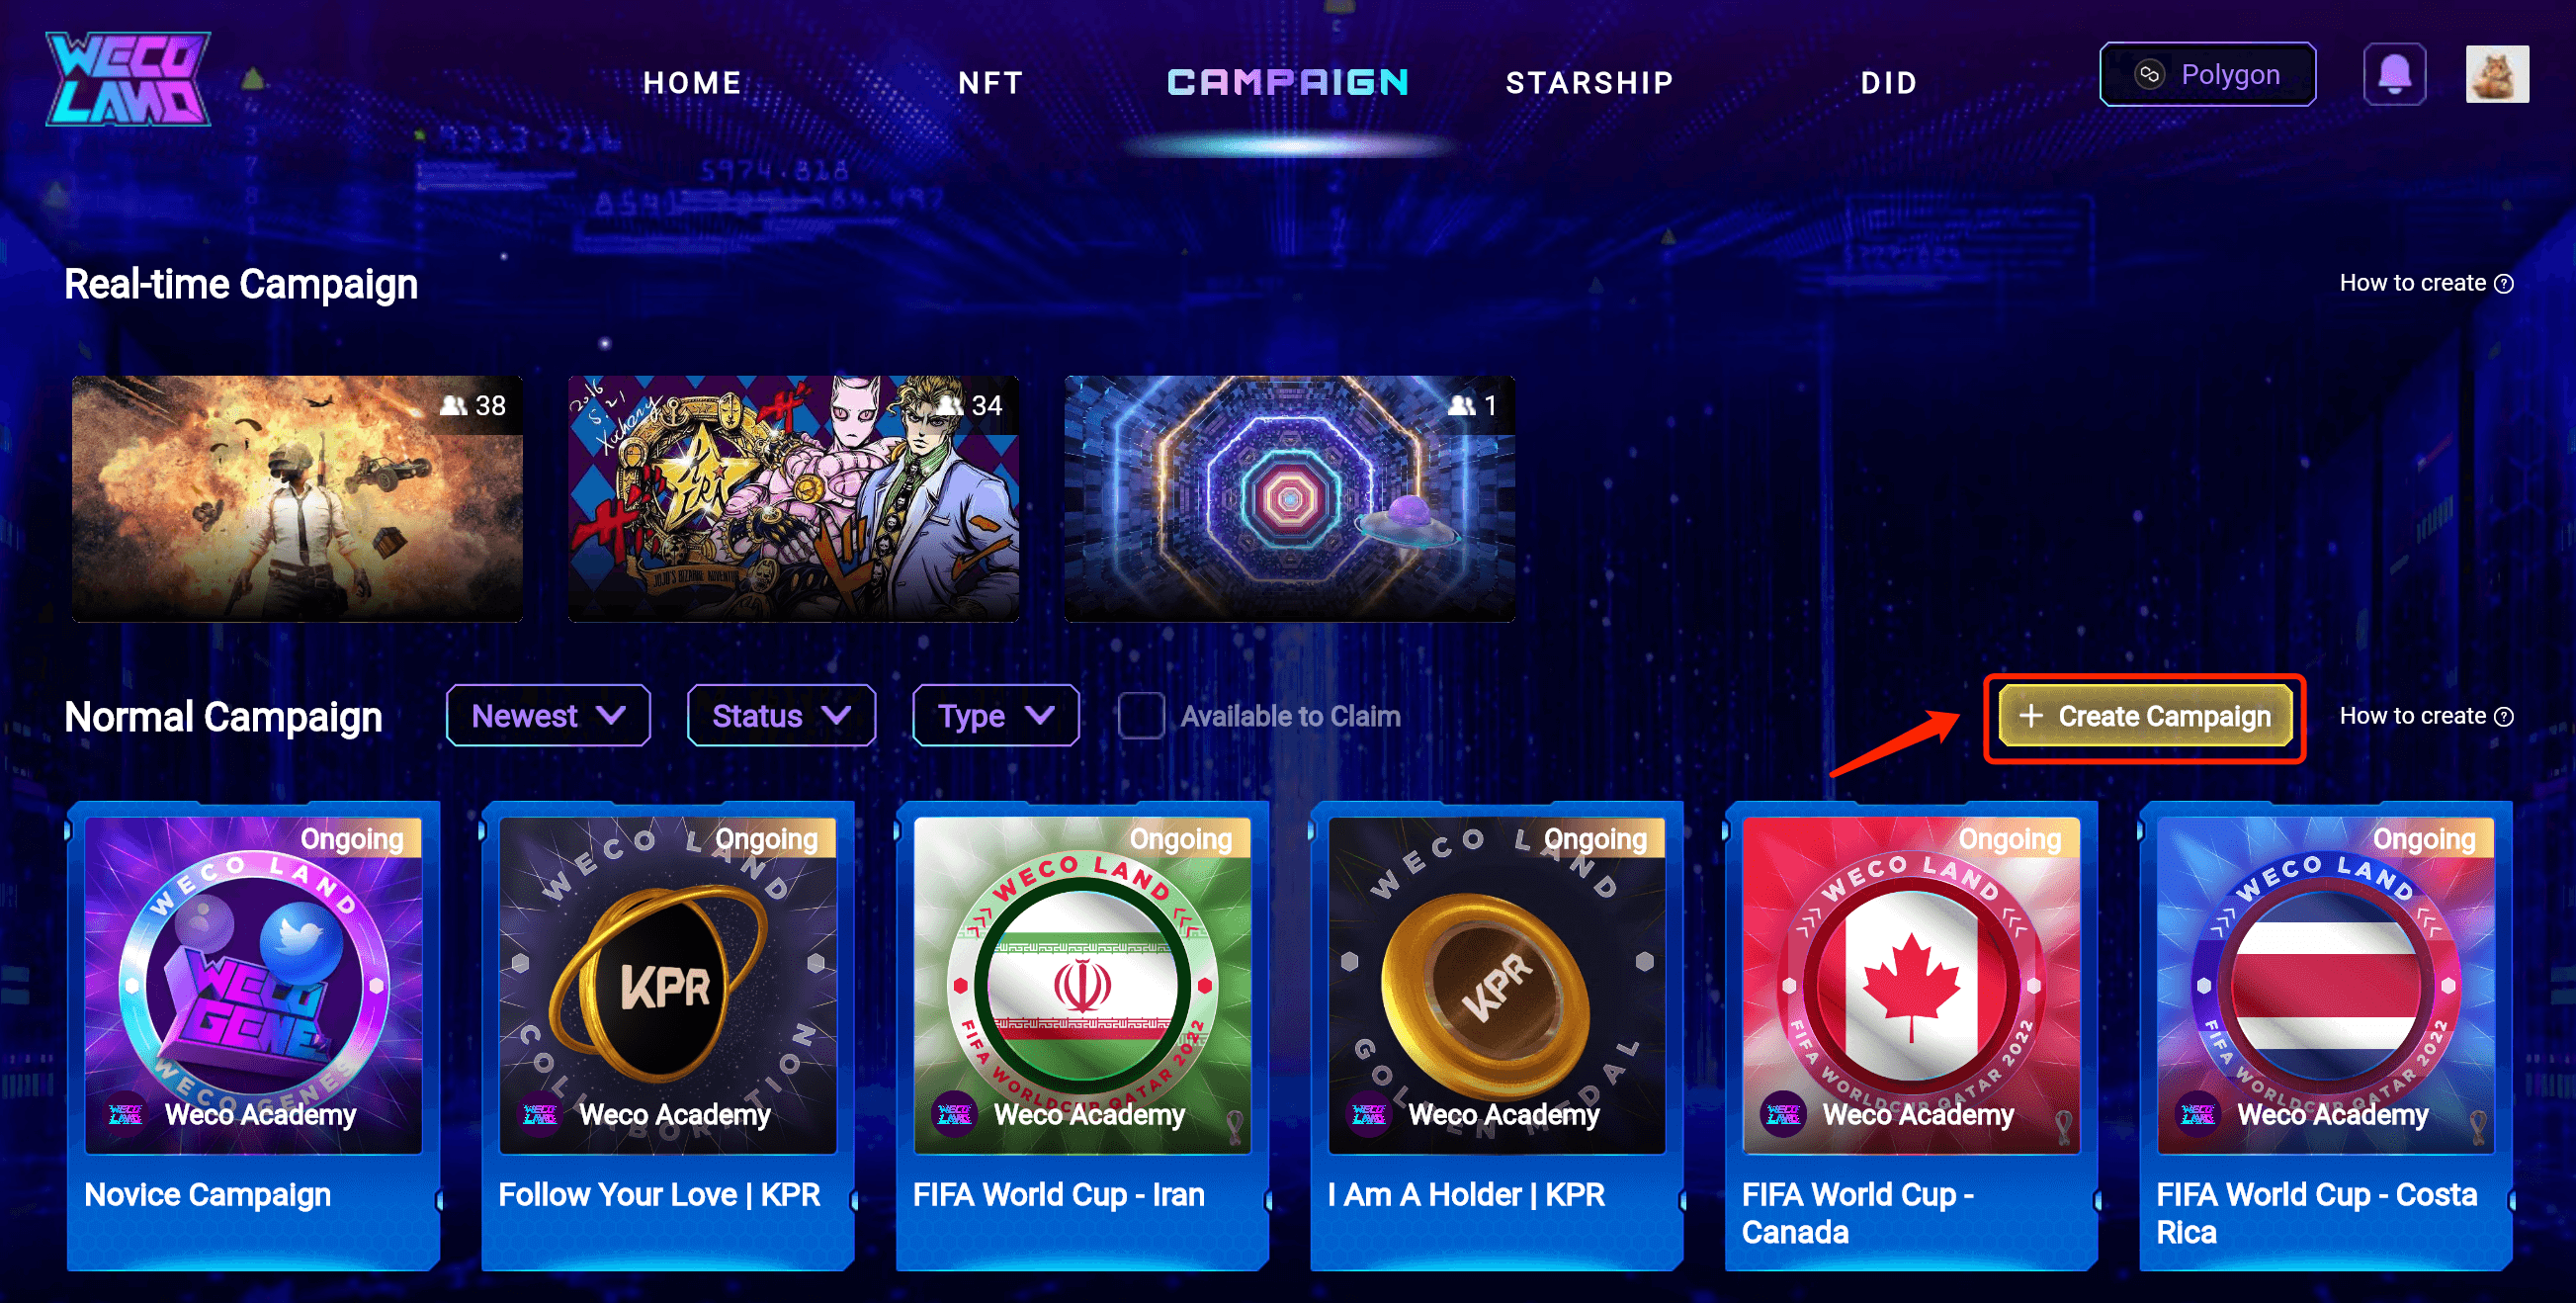
Step 1: If you haven’t published any campaigns before, you have to apply for the White List first to publish a normal Campaign. Hit “Create Campaign” as shown in the pic down below.
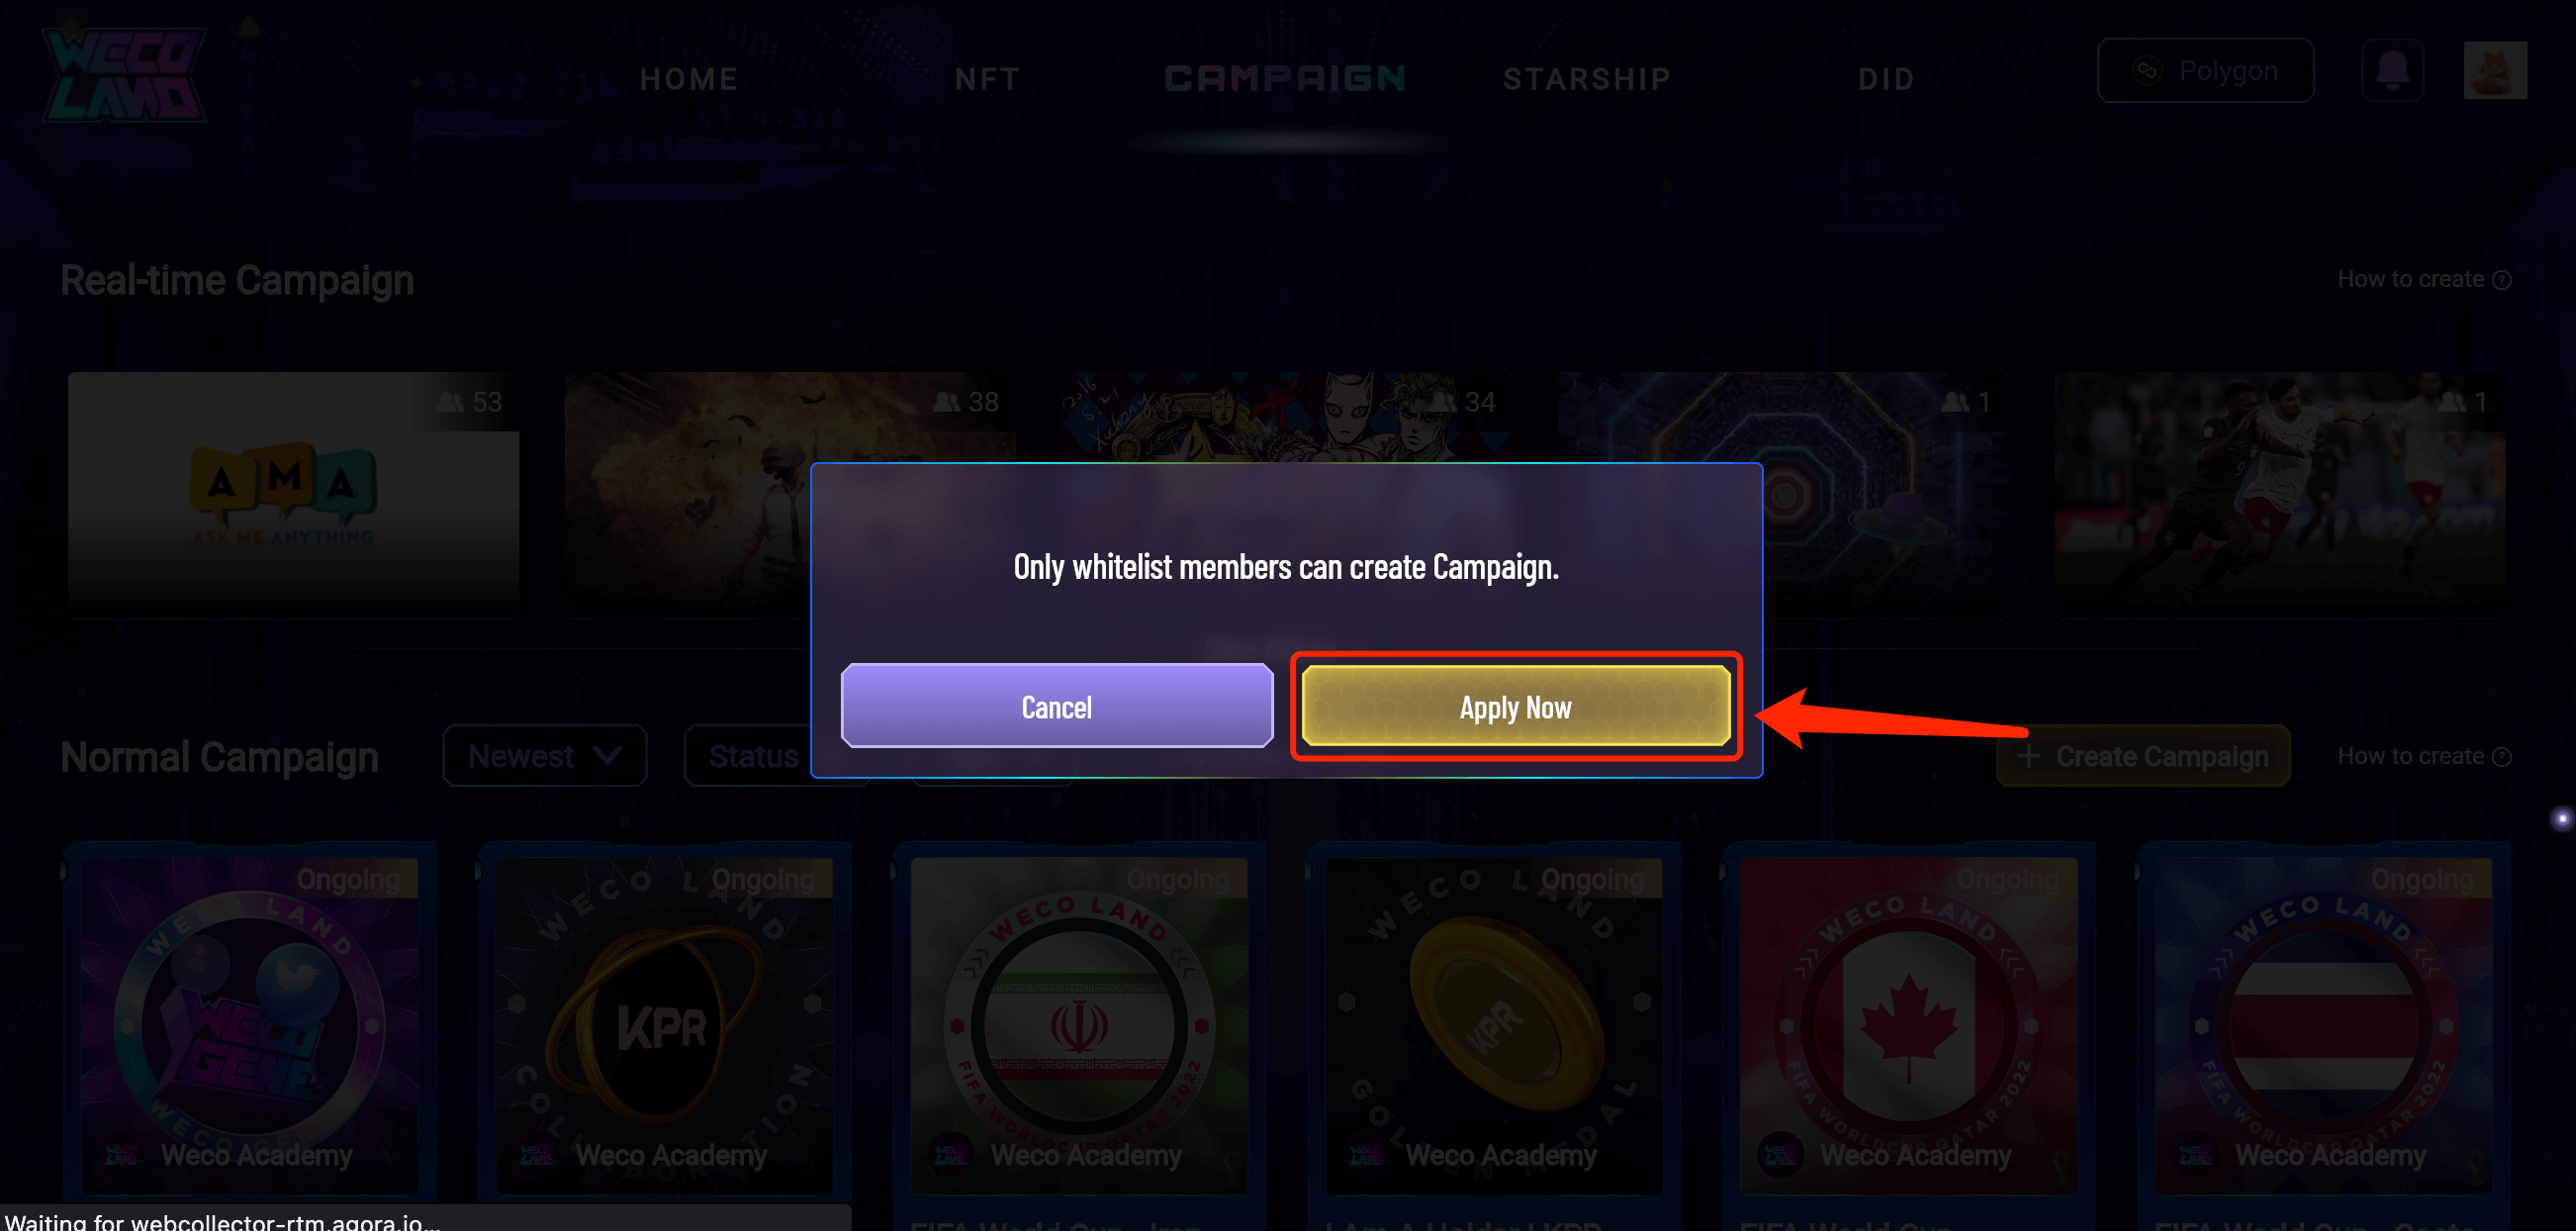
Step 2: Tap on “Apply Now” on the pop-up window.
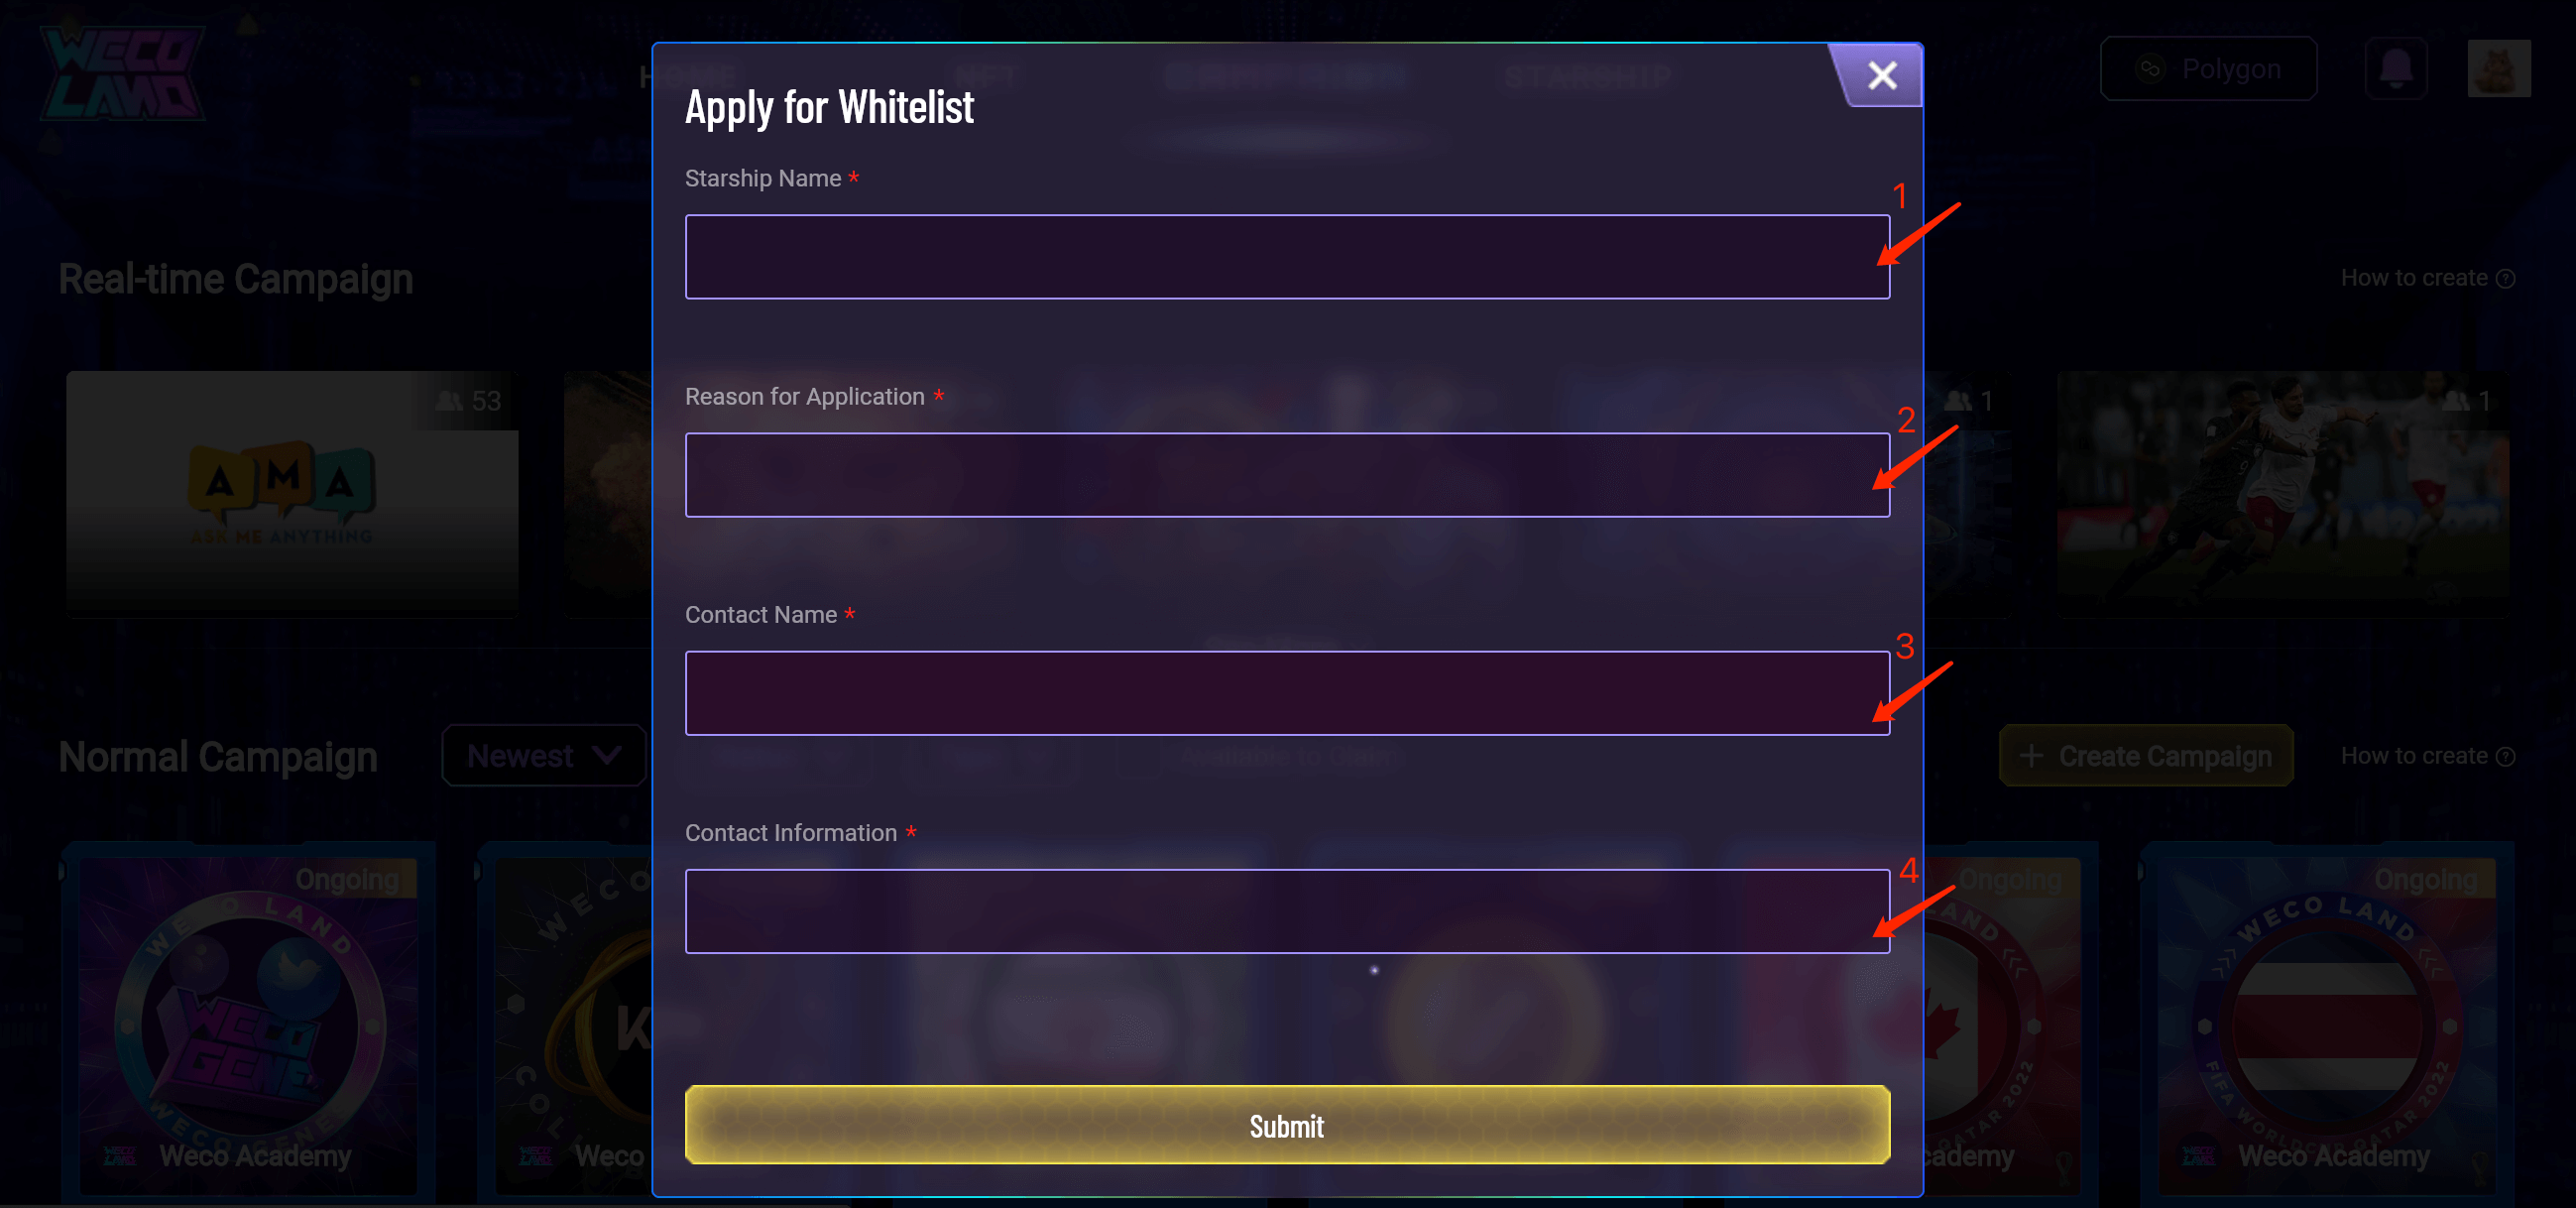
Step 3: Submit your information as listed below:
- “Starship Name”: the community name with which you’re publishing the campaigns;
- “Reason for Application”: please elaborate on why you need this feature;
- “Contact Name” & “Contact Information”: your contact details.
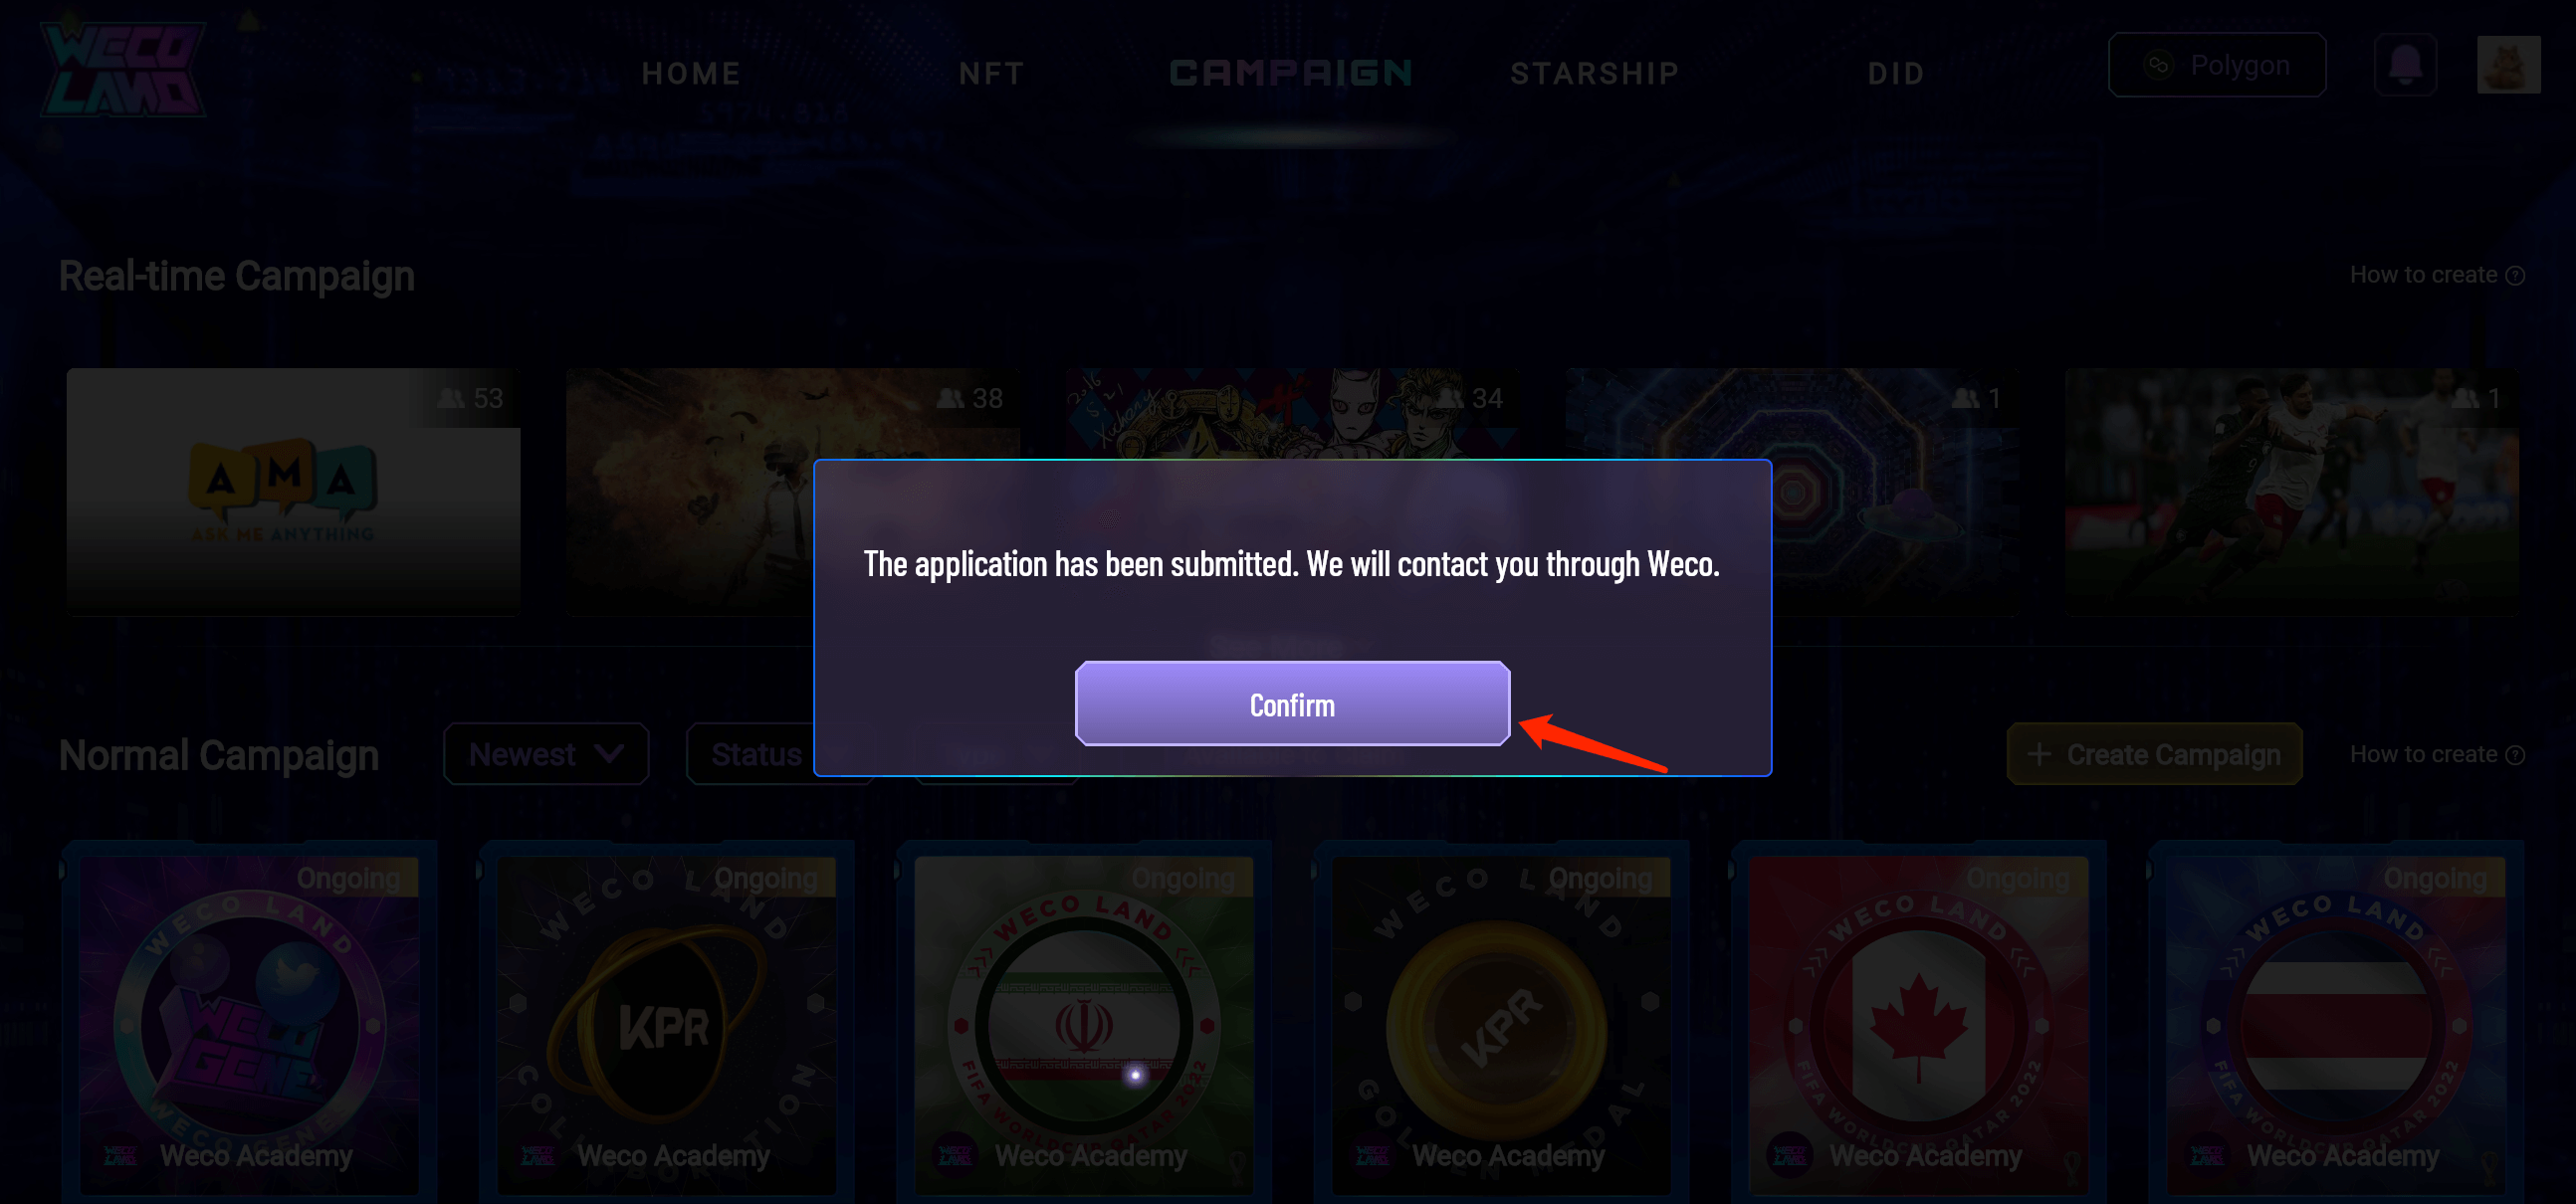
Step 4: After the submission, you will be contacted through Weco Land for further notification. You will check out the notifications by tapping on the icon of “🔔” in the top right corner. Just tap on “Confirm” as shown in the picture.
How to publish normal Campaigns?
Step 1: Tap on “Create Campaign” to start.

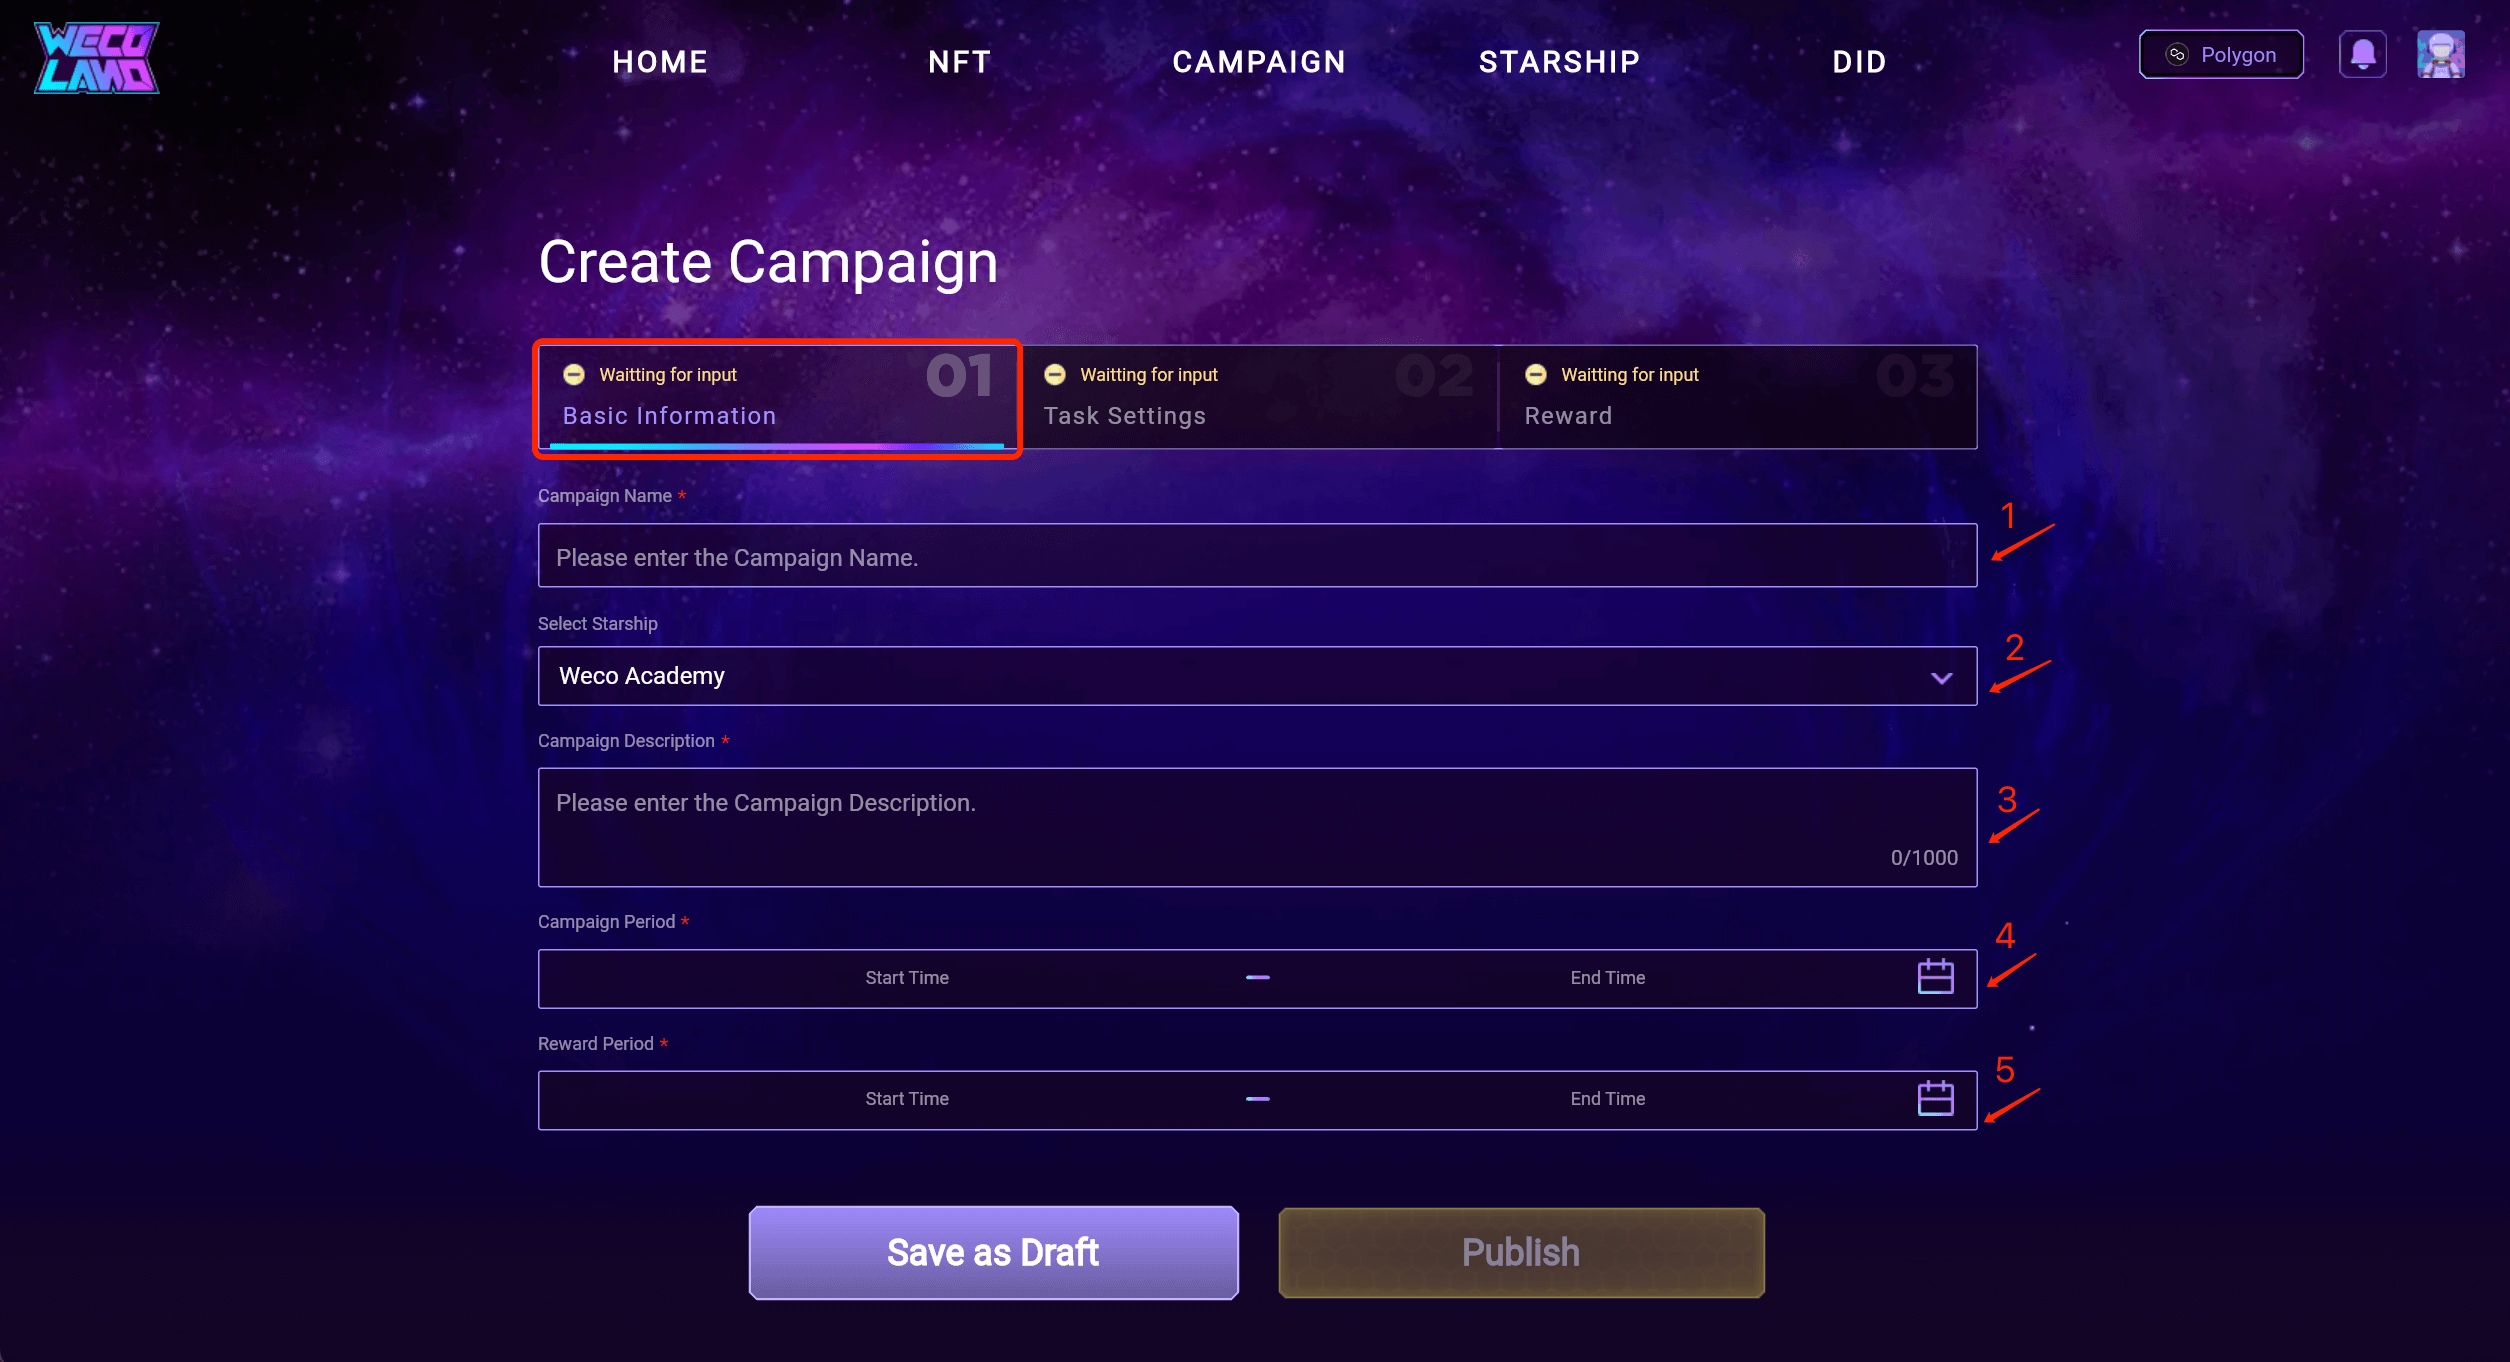
Step 2: There’re 3 parts to be set up to create a Campaign. The 1st part is about the “Basic Information” of the Campaign. Fill in the information as listed in the 5 arrows.
- 1st - Campaign Name: an appealing name for your Campaign;
- 2nd - Select Starship: the Starship where you’re publishing the campaigns;
- 3rd - Campaign Description: detailed instruction for this Campaign;
- 4th - Campaign Period: Select the starting and ending period of the Campaign and then press “OK”.
- 5th - Reward Period: Select the starting and ending period of the reward claiming and then press “OK”.
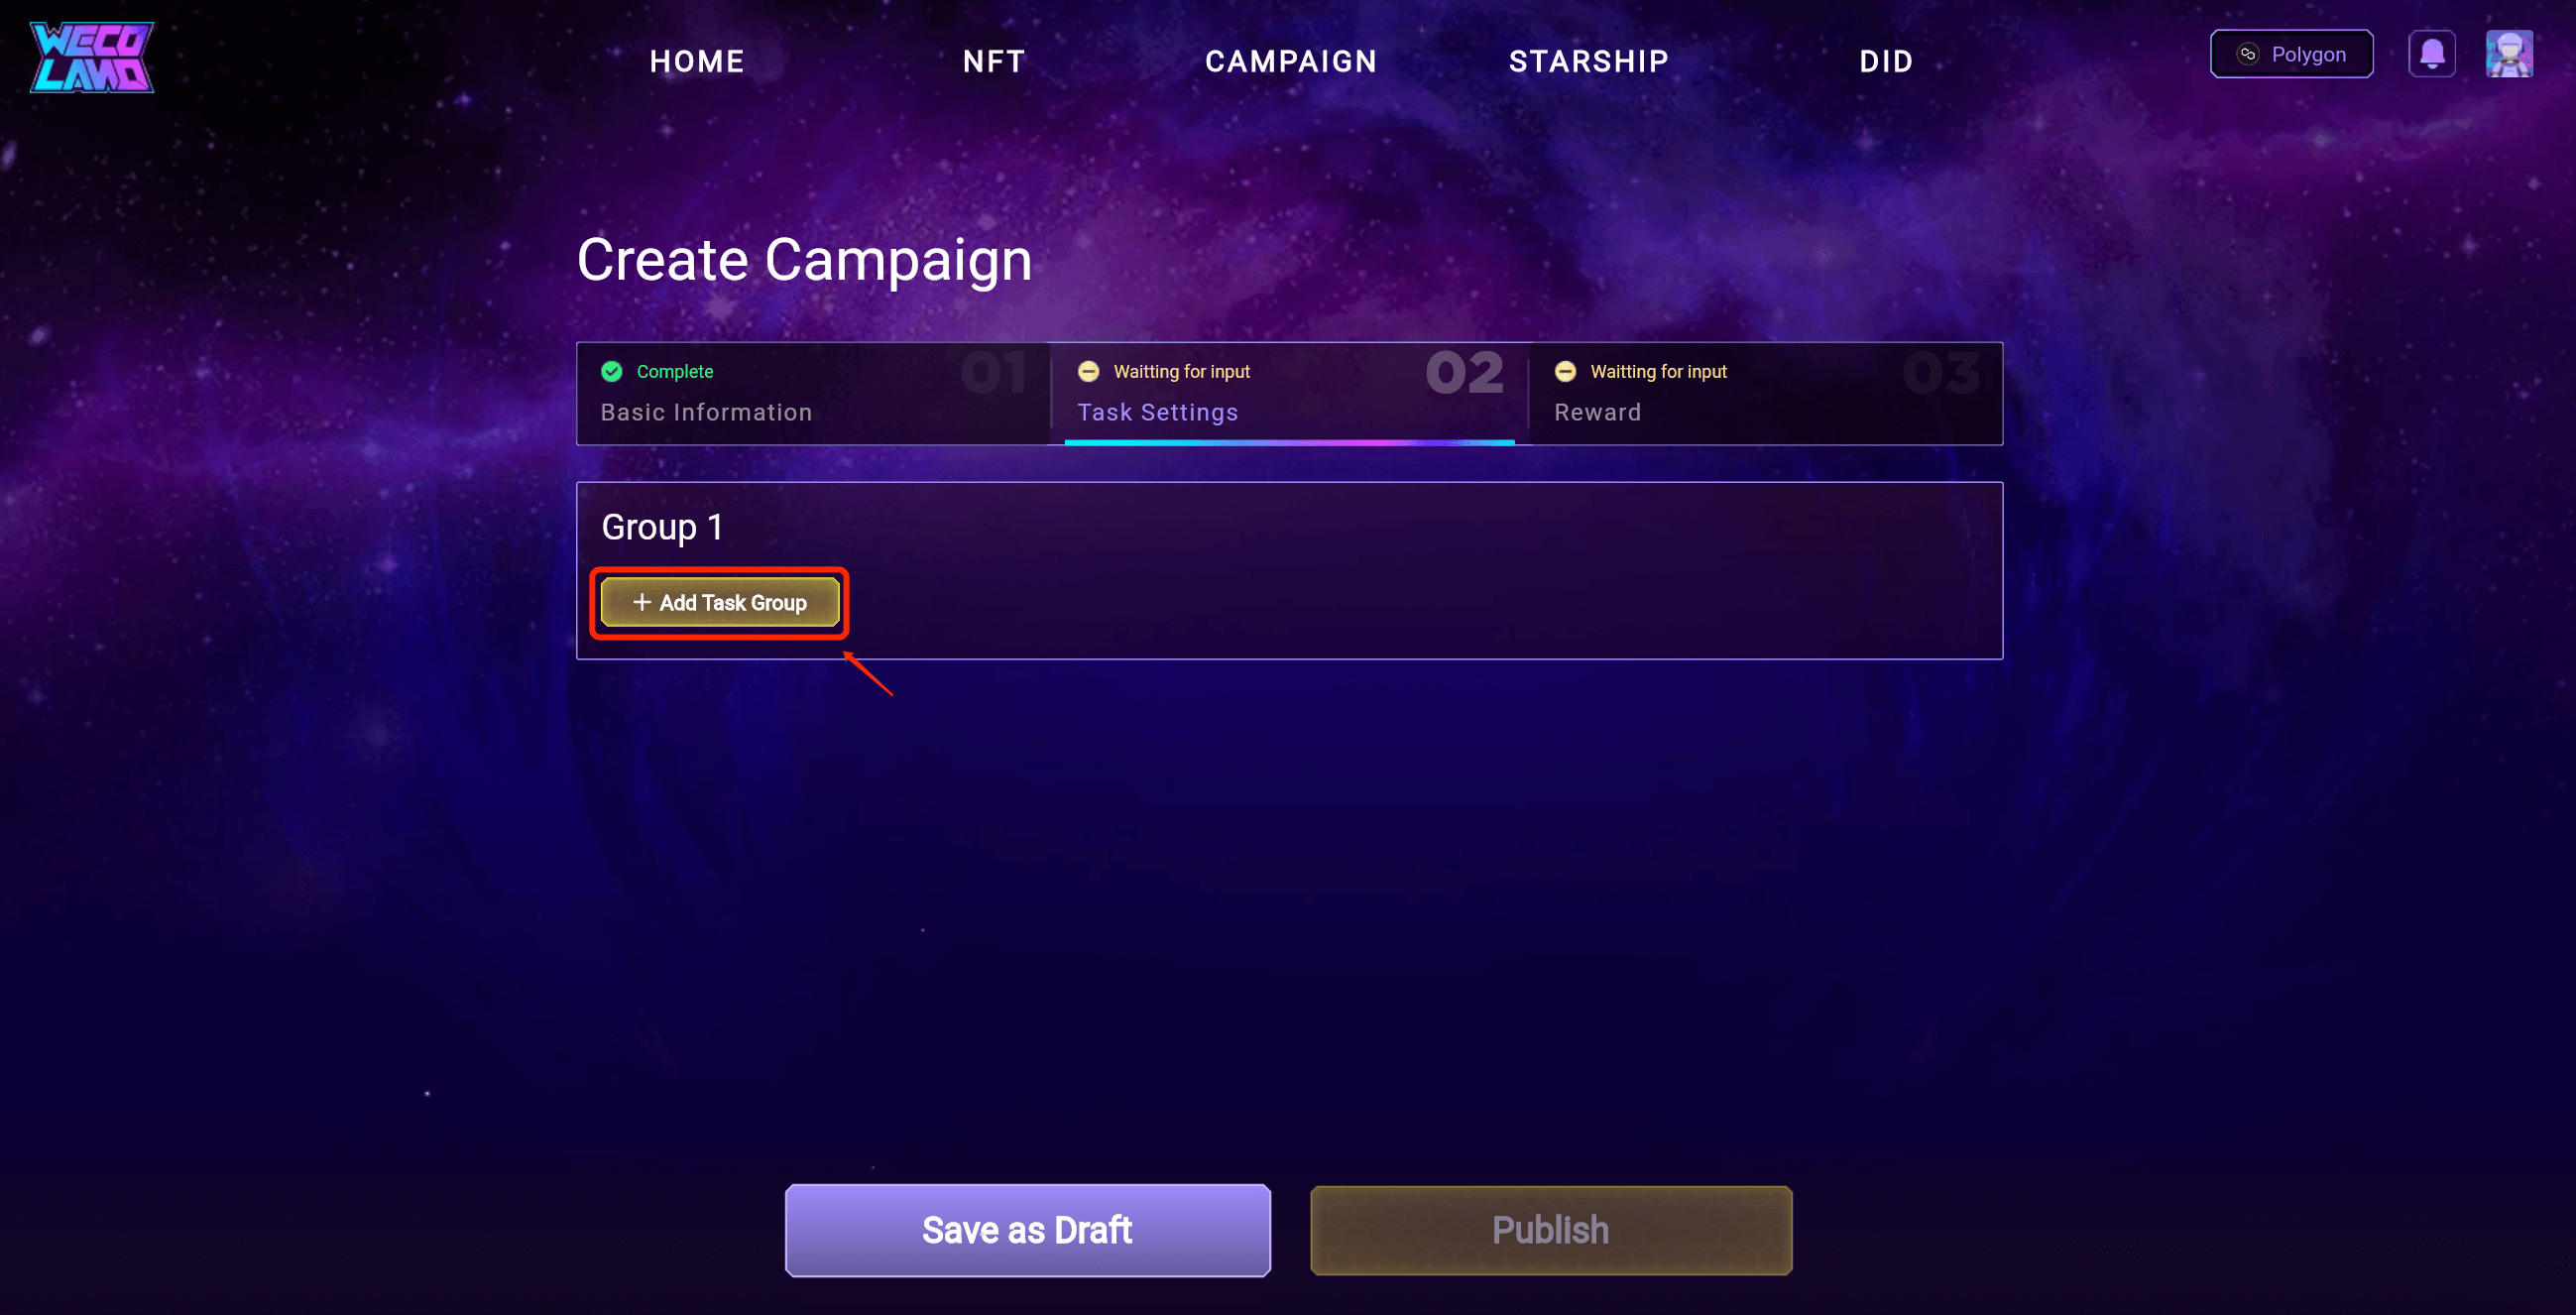
Step 3: After the “Complete” in green appears in the 1st part and then you’re off to move to the 2nd part - Task Settings. You can add a Task Group by tapping on “+Add Task Group”, different groups are independent of each other.
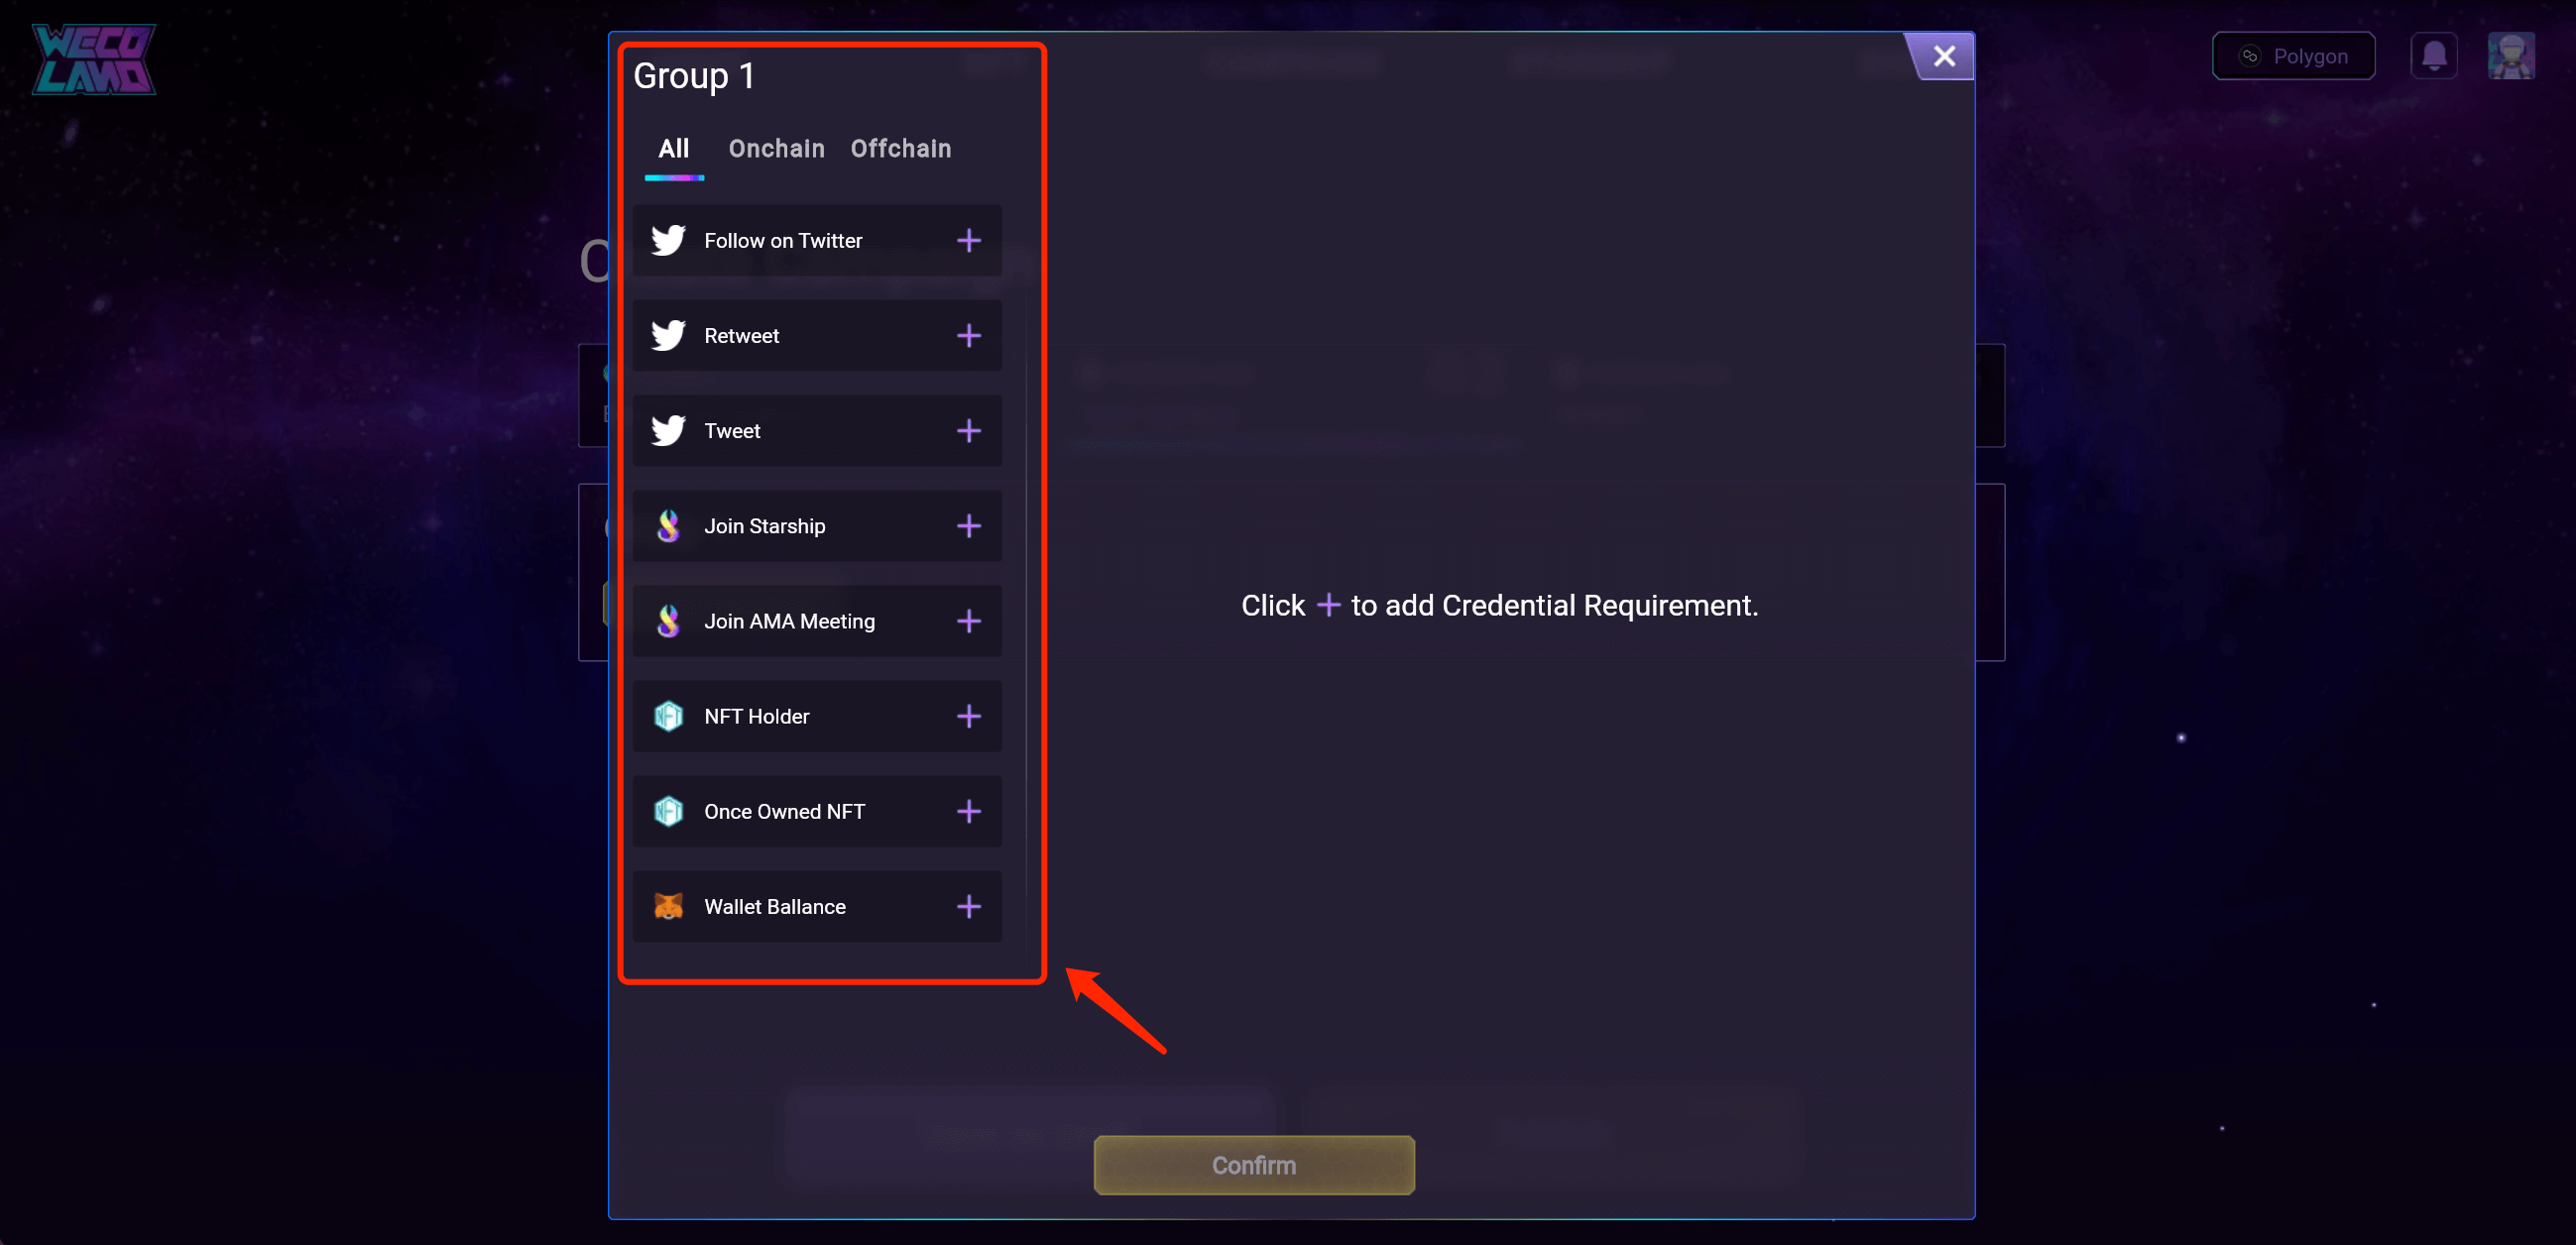
Step 4: Both on-chain and off-chain campaigns can be added within a task group. Campaigns within one task group should be done at the same time. You can click “+” to add credential requirements as follows.
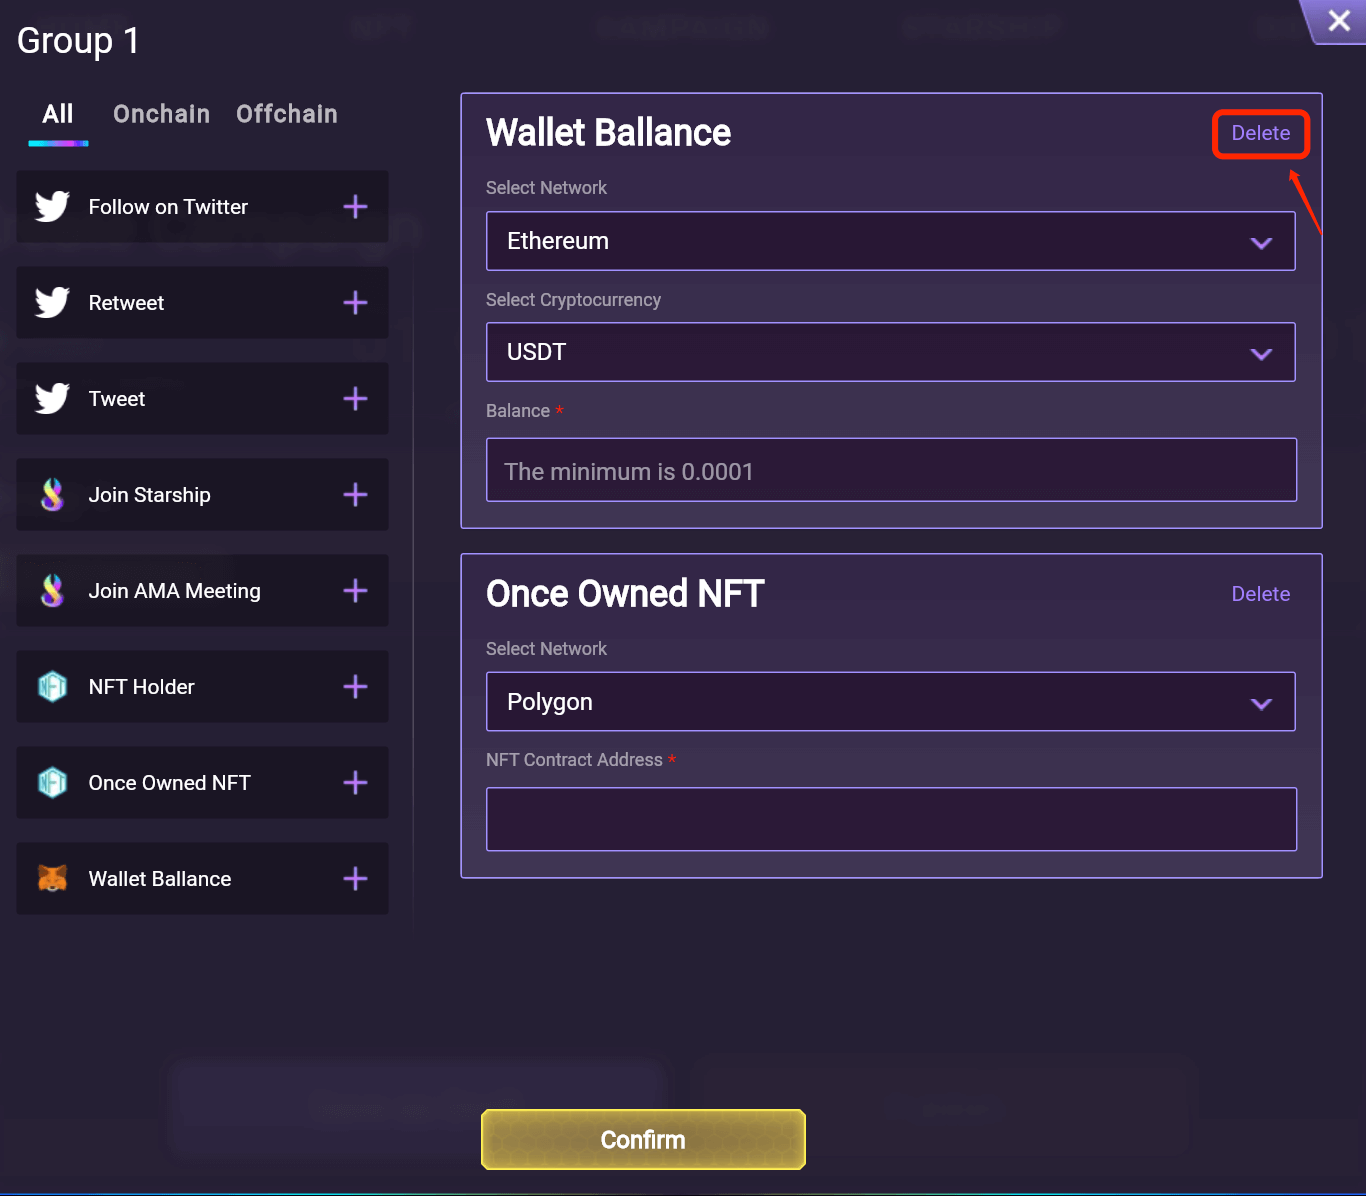
And you can always click on “Delete” any requirements that you wanna them out.
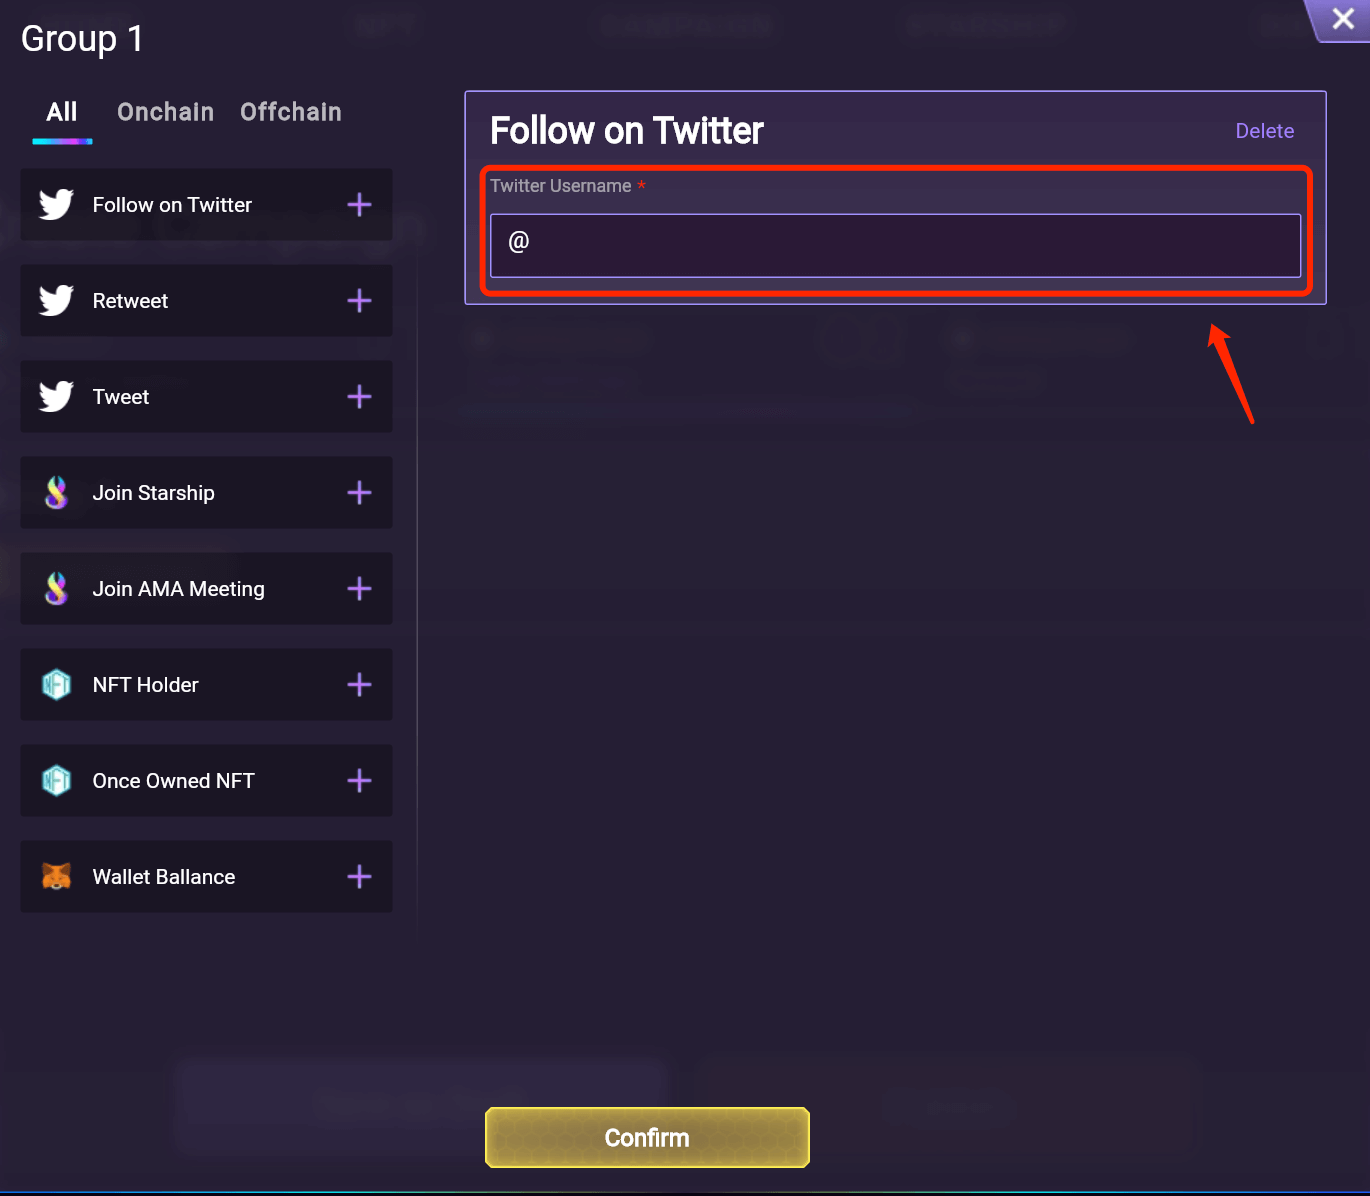
Follow Twitter: add the Twitter account that you wanna be followed.
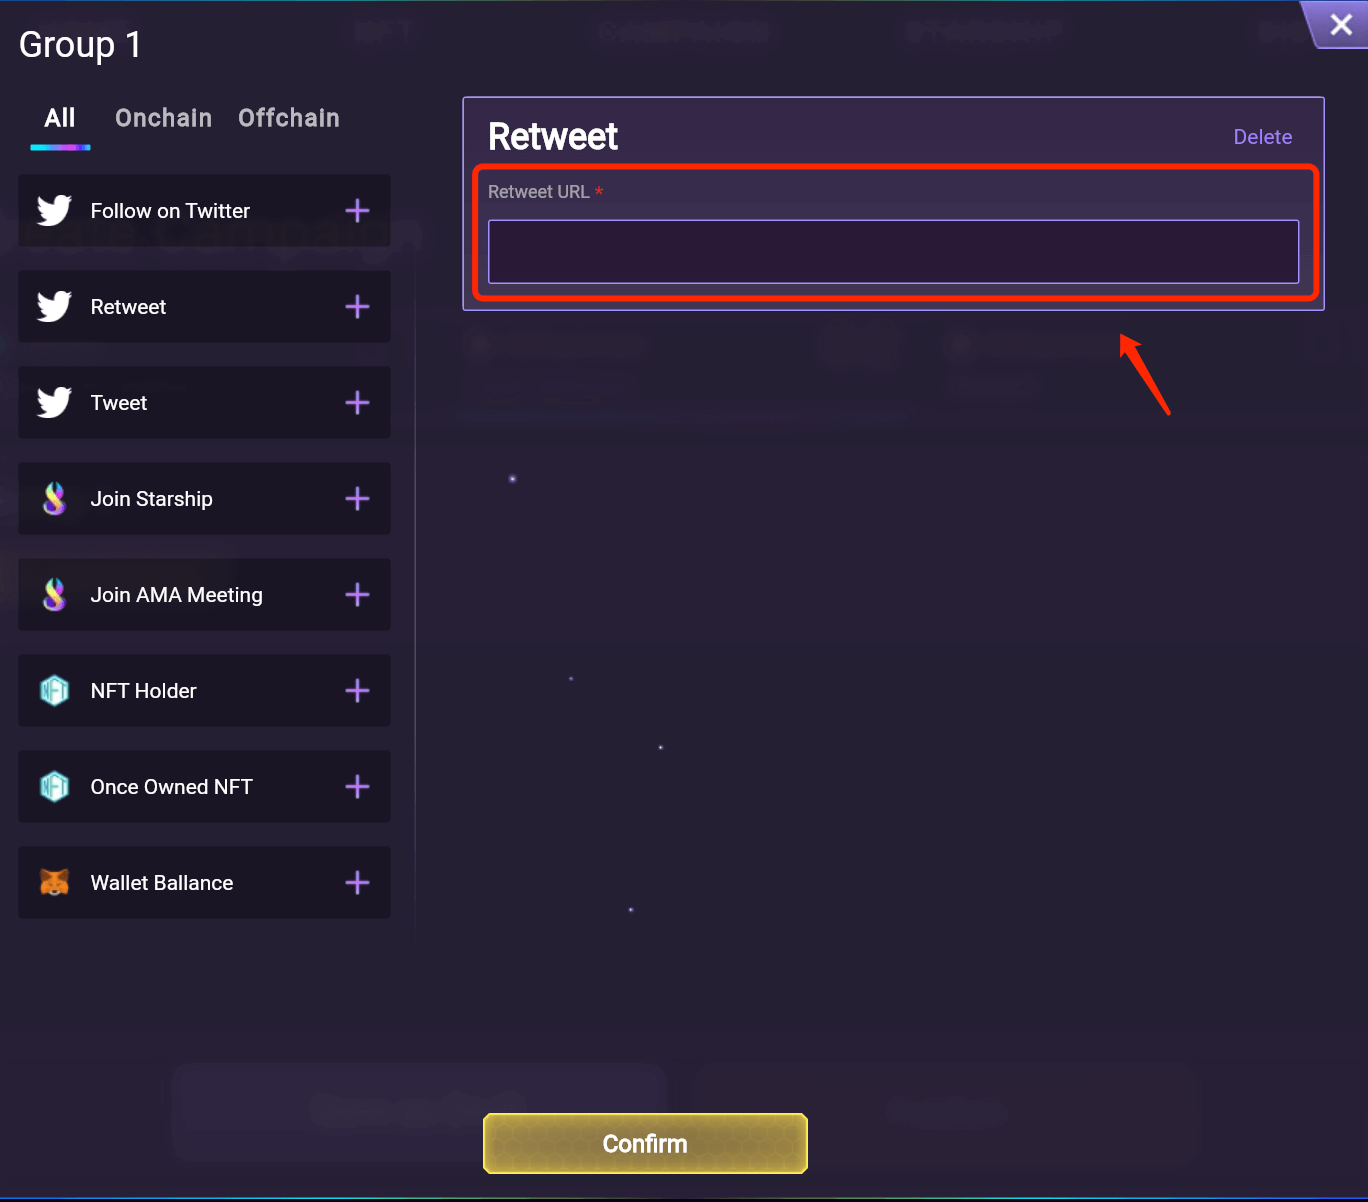
Retweet: add the URL of the tweet you wanna be retweeted.
Tweet: Type out the content of the tweet within the word limit of 280. And you can tap on the button to add another requirement of “Tag 3 friends”.

Join Starship: If you wanna set up one requirement to let other people join your Starship, then just input the invitation link of the Starship.
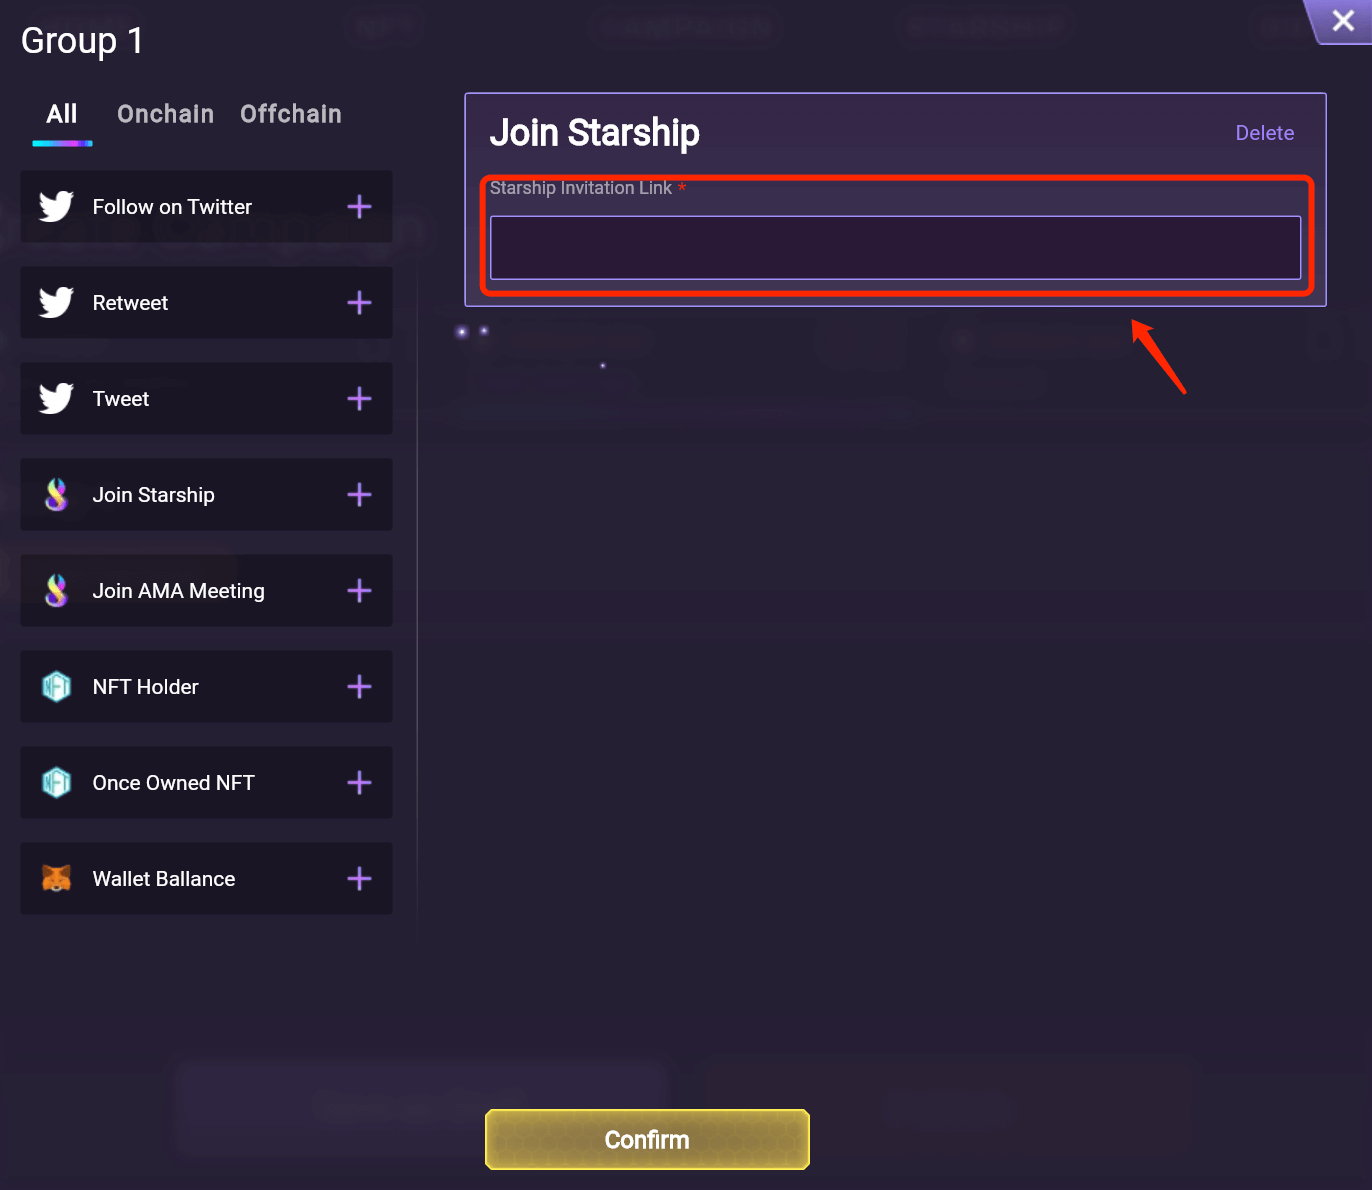
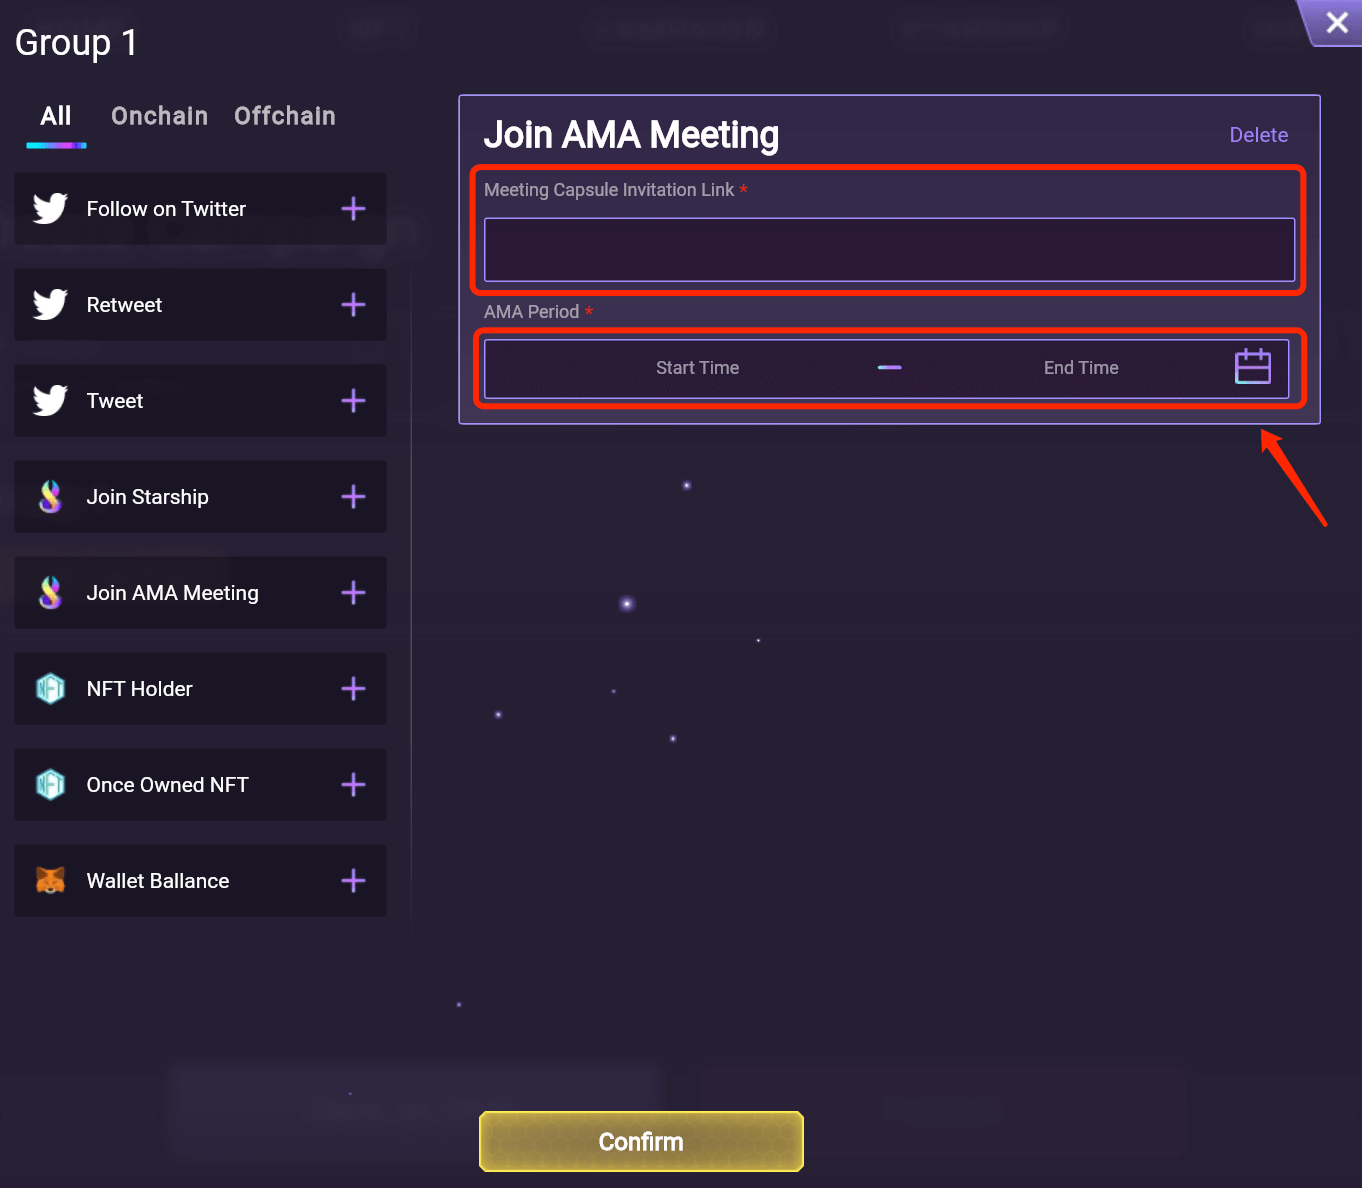
Join AMA Meeting: Input the invitation link within the message box on the 1st line and then choose the specific time period for this AMA.
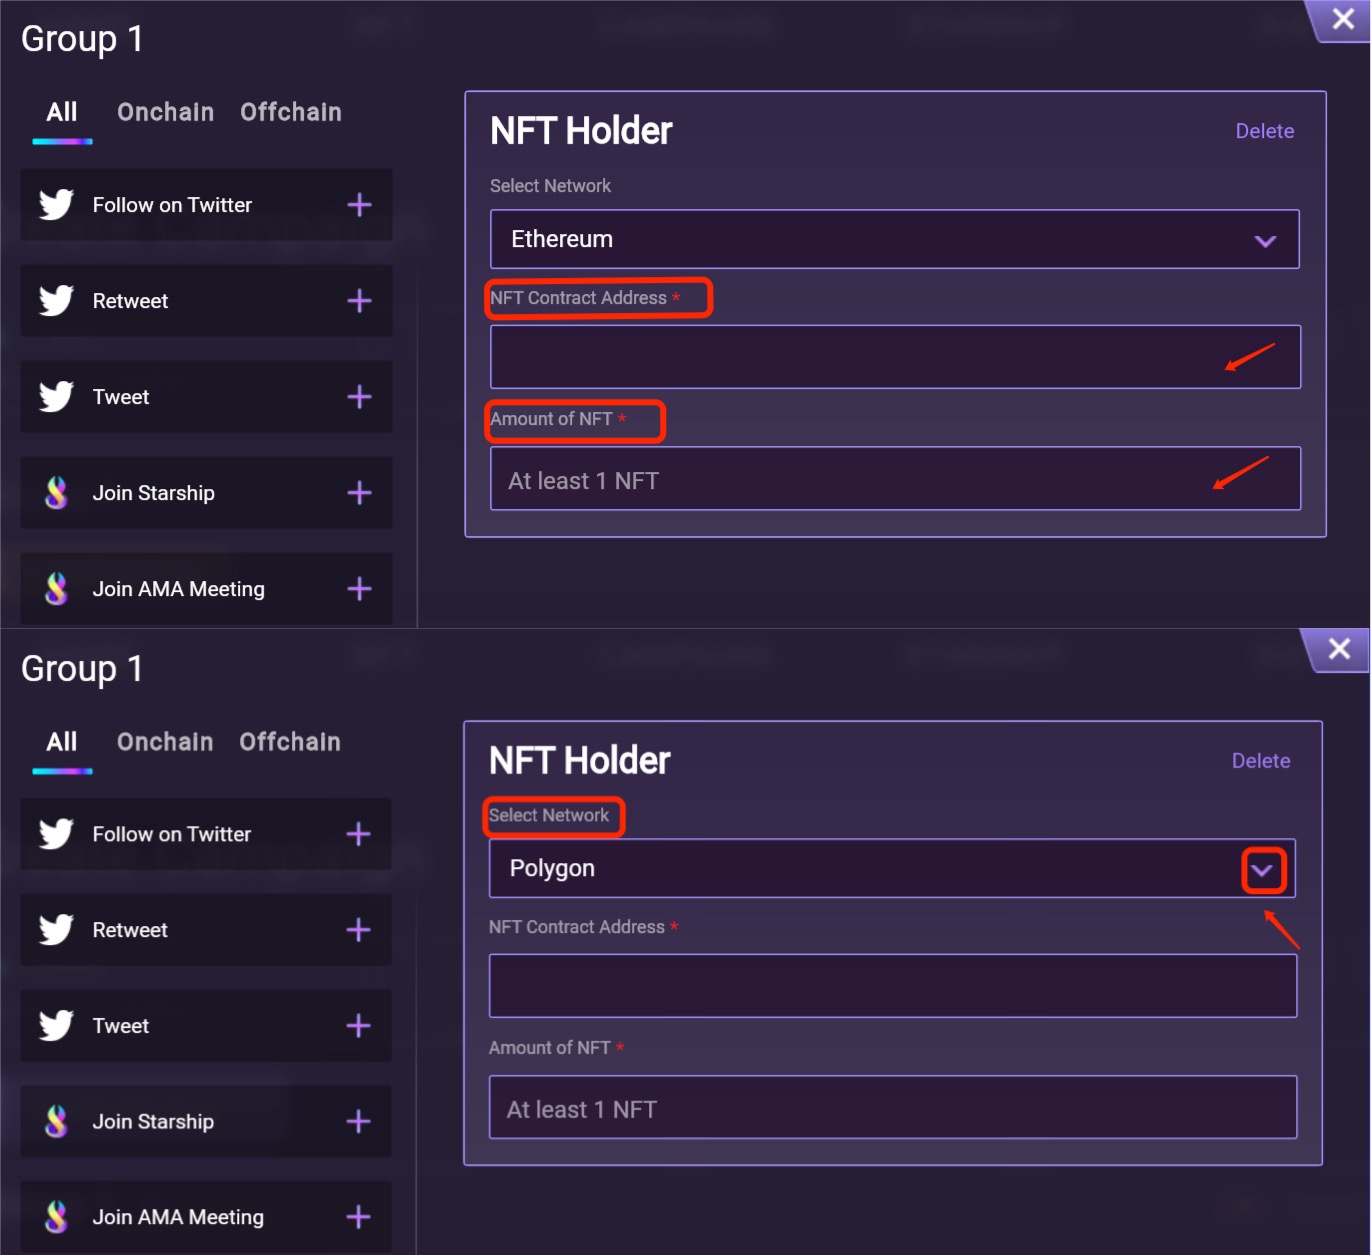
NFT Holder: If you wanna use holding certain NFT as a filter, then choose “NFT Holder” and click the drop-down option to choose a different network. And then you can add the contract address of the NFT and how many NFTs should be held at least.
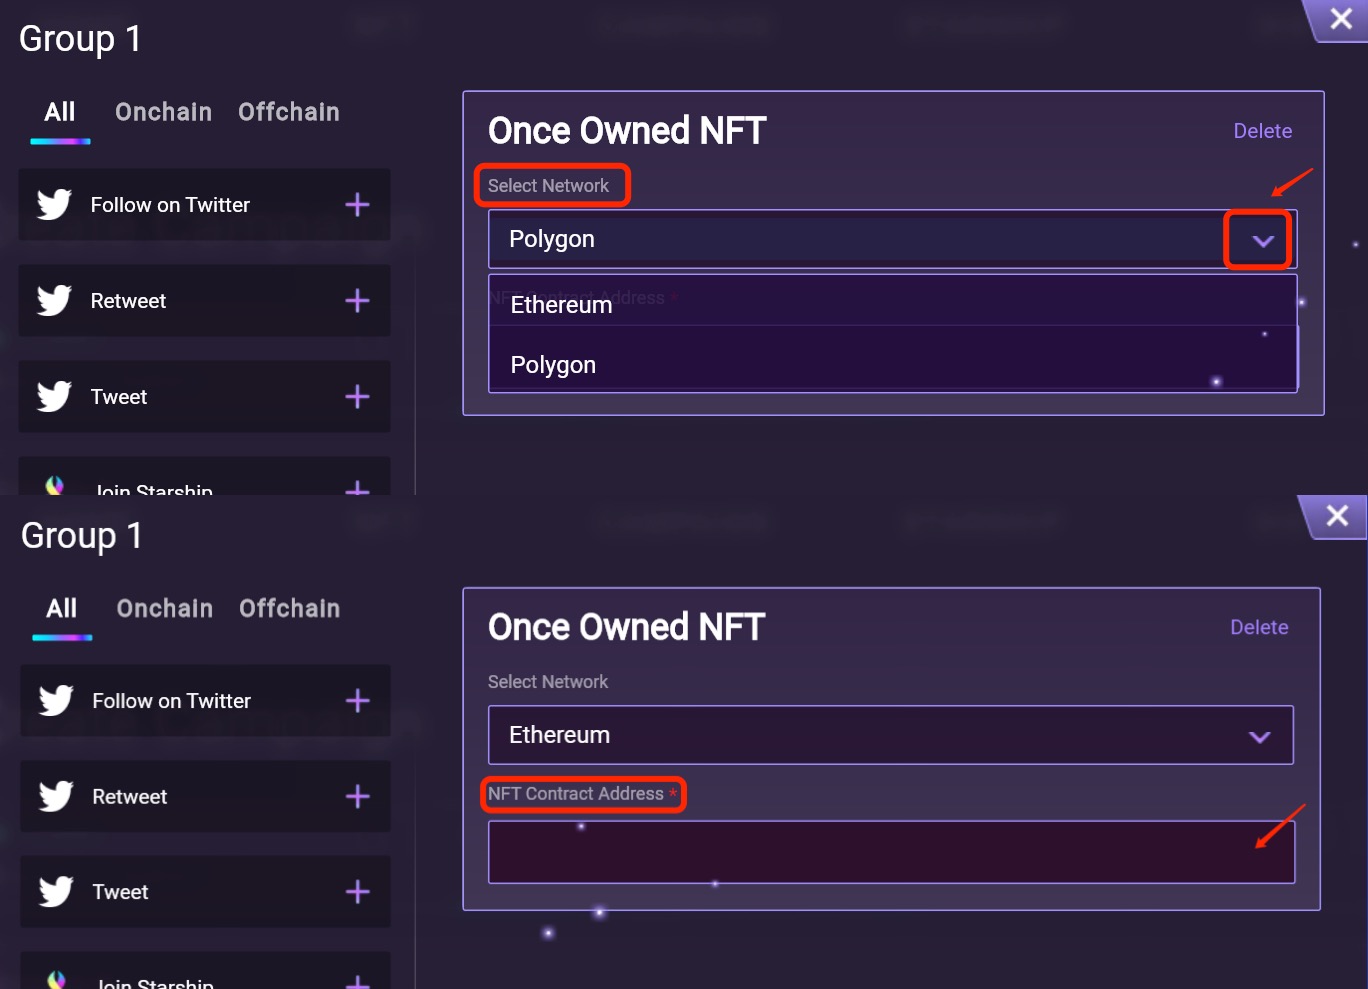
Once Owned NFT: Click the drop-down option to choose a different network. And then add the contract address of the NFT.
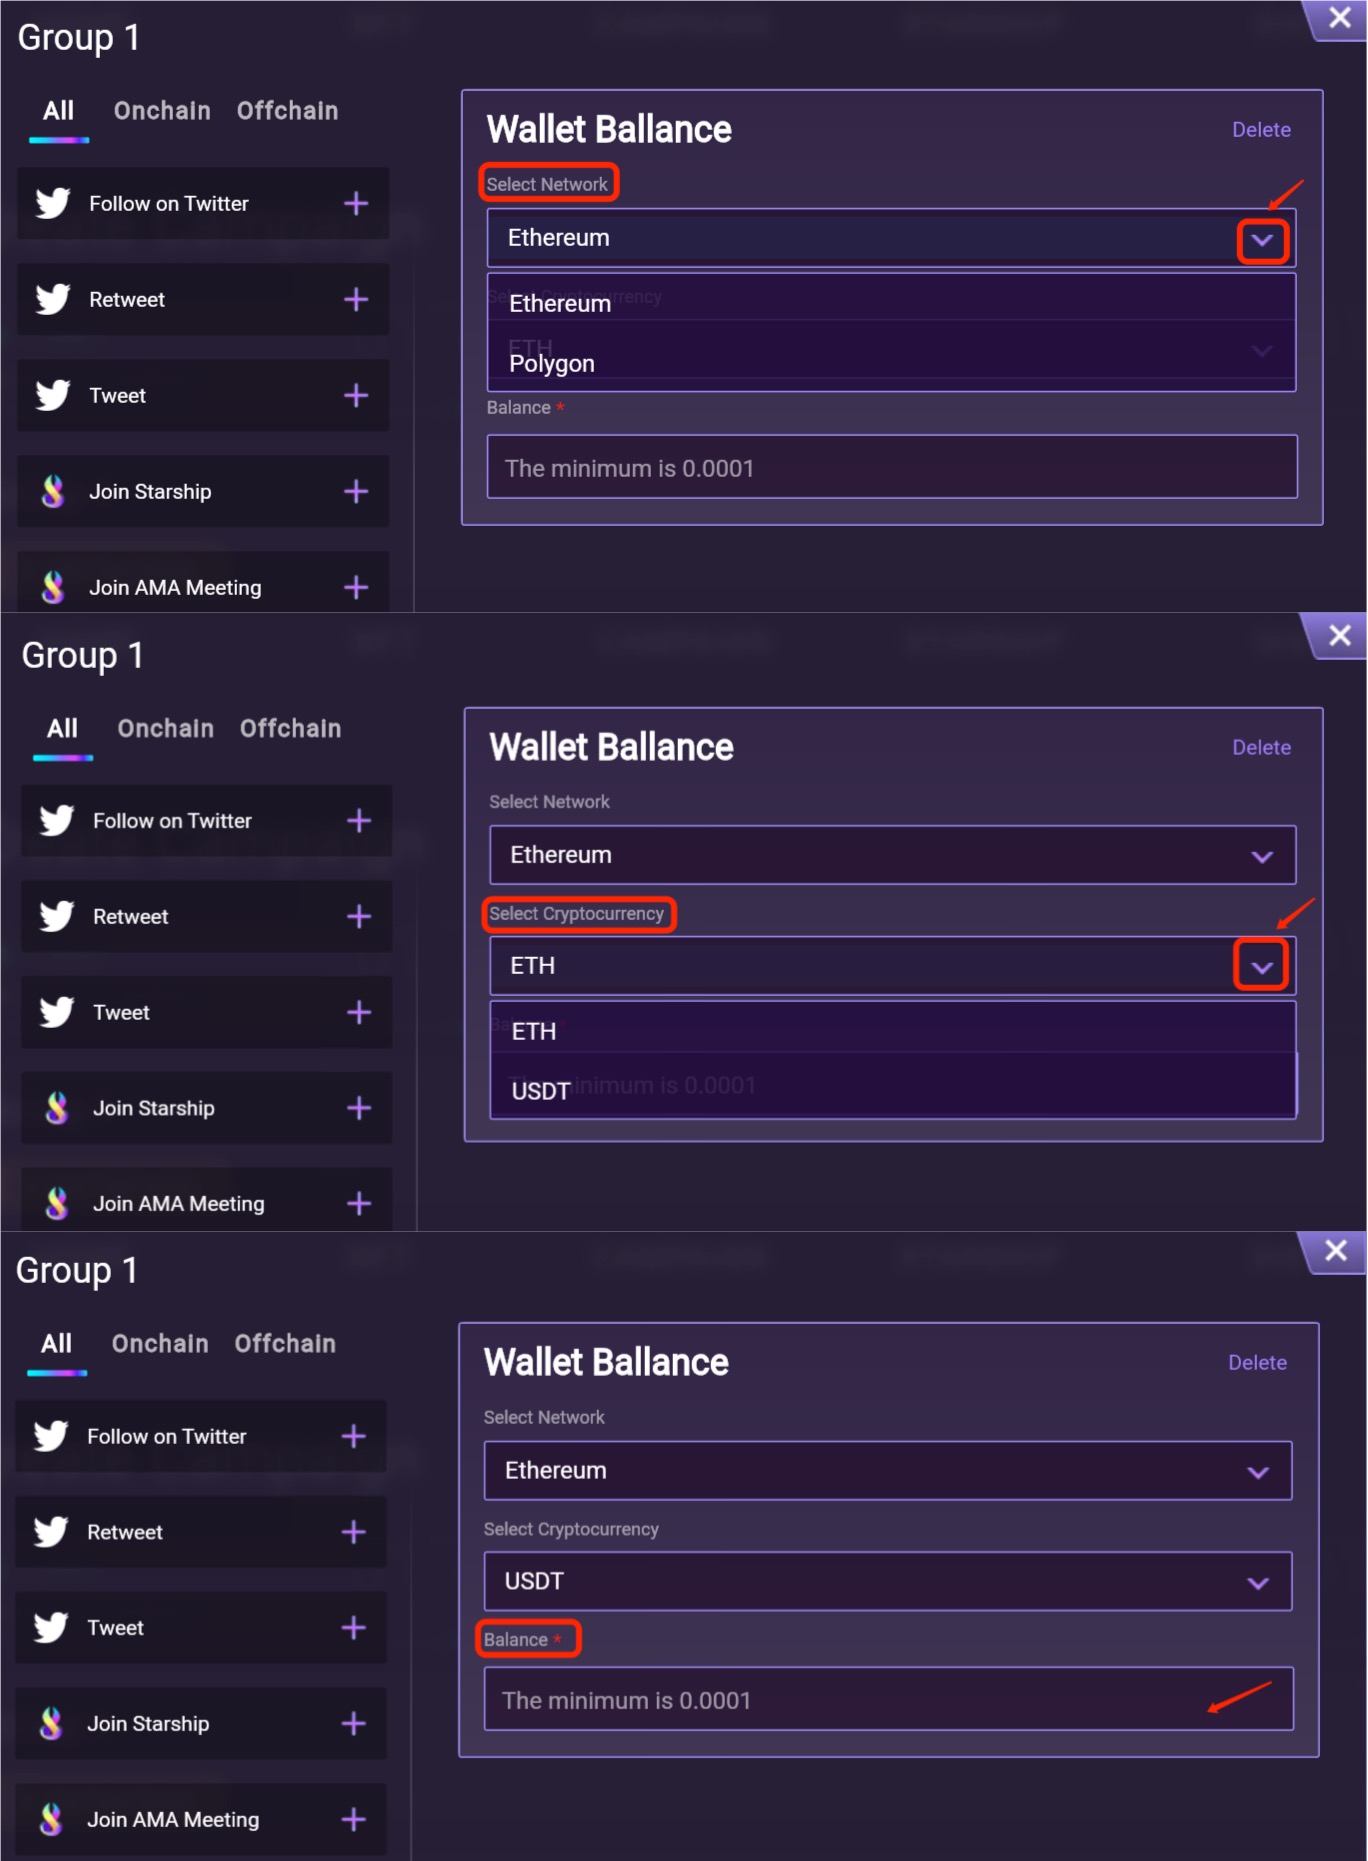
Wallet Balance: Click the drop-down option to choose a different network.cAnd then click the drop-down option again to choose different cryptocurrencies. At last, input a specific number as your requirement.
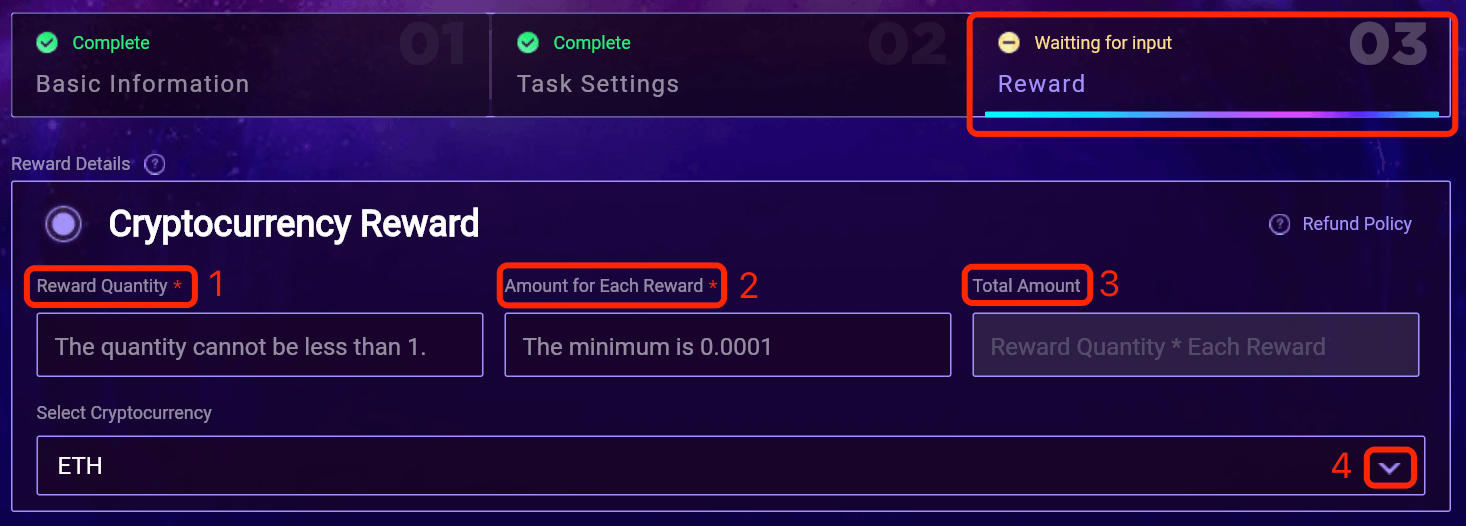
Step 5: After you’re done with the Task Settings, you can move to the 3rd part - Reward. You can set up details for the reward. There’re 2 kinds of rewards - Cryptocurrency Reward & Medal Reward.
- Cryptocurrency Reward:
- No. 1 is about how many people can claim the reward.
- No. 2 is about how much cryptocurrency can be claimed for each reward.
- No. 3 is about the total number of cryptocurrencies.
- No. 4 is for you to use the drop-down option to choose different cryptocurrencies e.g. ETH, MATIC, etc.
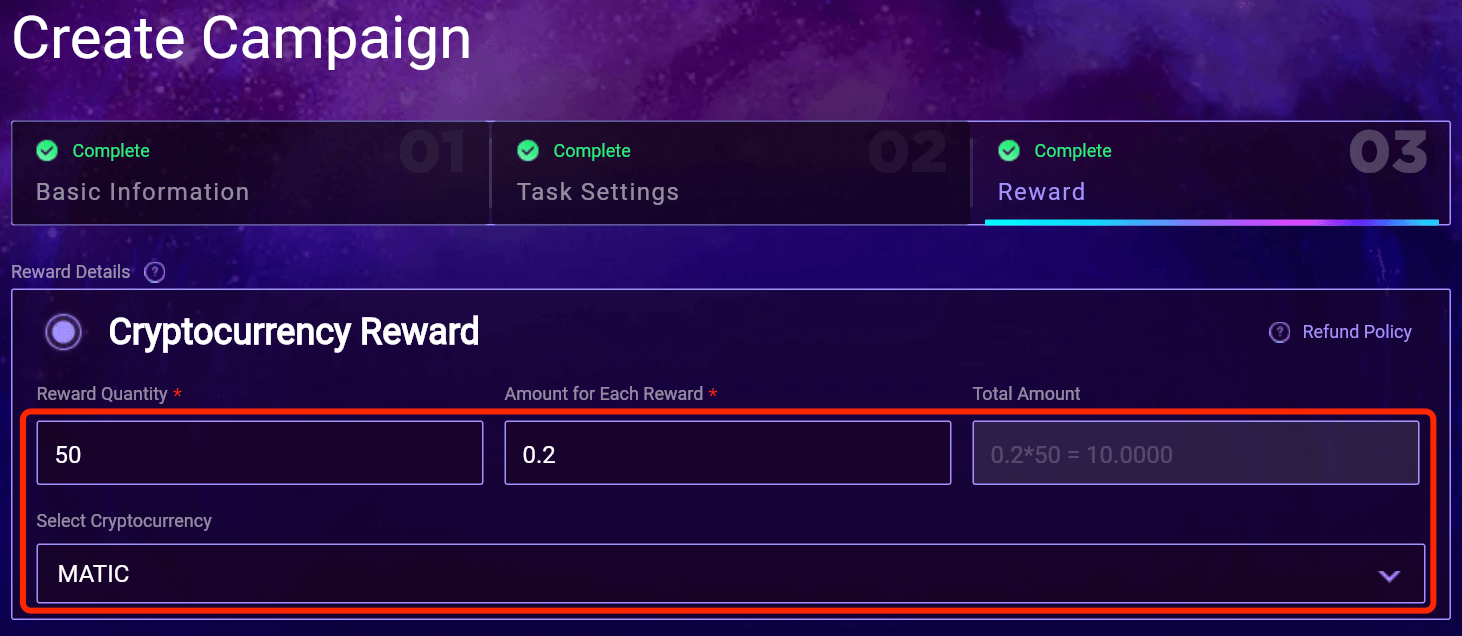
For example 👇
- Medal Reward:
- No. 1 is to upload the image for the medal.
- No. 2 is the total amount of the medals that can be claimed.
- No. 3 is the name of this collection.
- No. 4 is the name of the specific NFT.
- No. 5 is to set up if this NFT can be transferred or not.

Step 6: After everything is set up properly, you can either choose to save the settings by clicking “Save as draft” or publish the campaign directly by clicking “Publish”. And then you can find all the saved draft or published campaigns in the DID tab.

What is DID (opens new window)
How to finish and claim rewards from normal Campaigns?
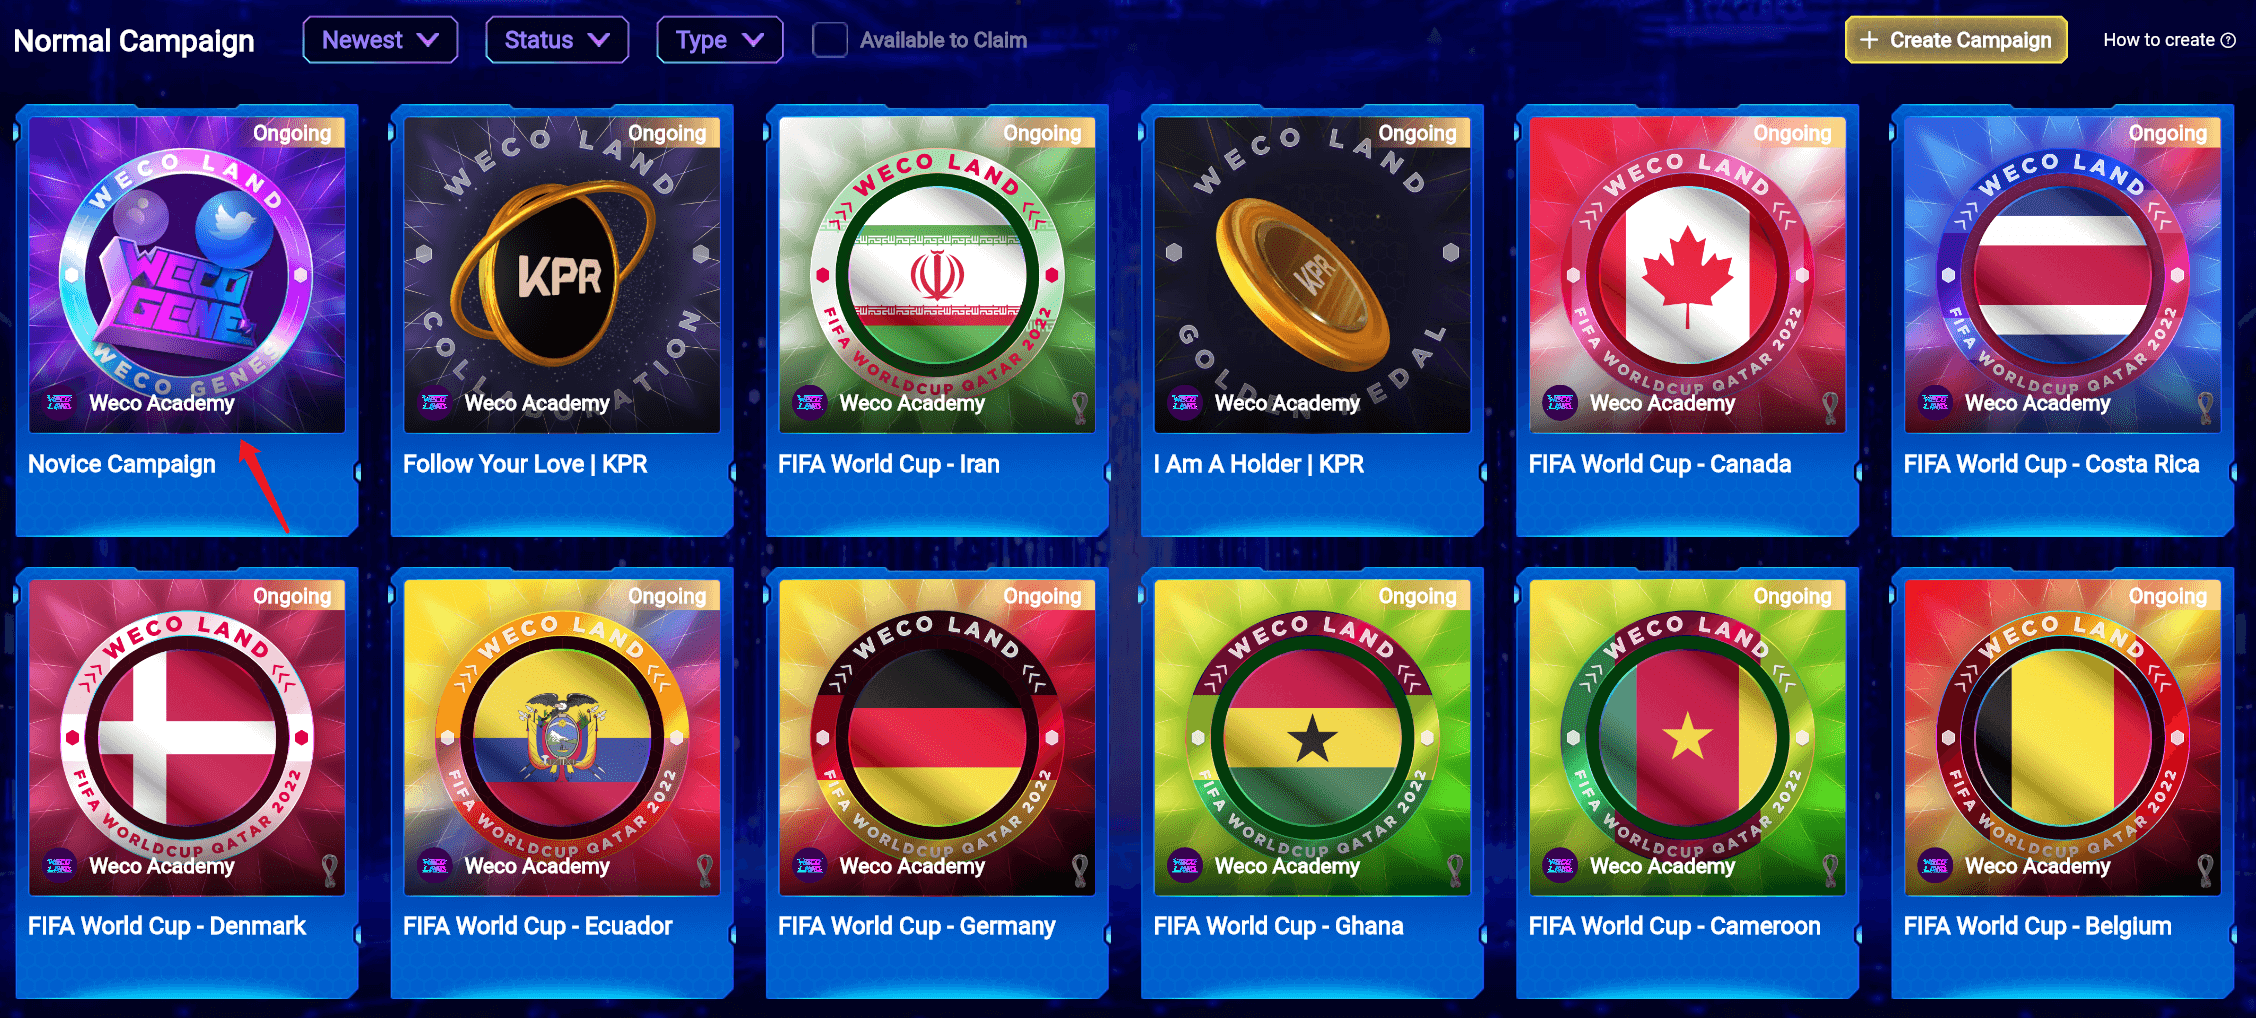
Step 1: Tap on any Campaigns that attract you.
Step 2: Finish all the tasks within this campaign to claim the reward.
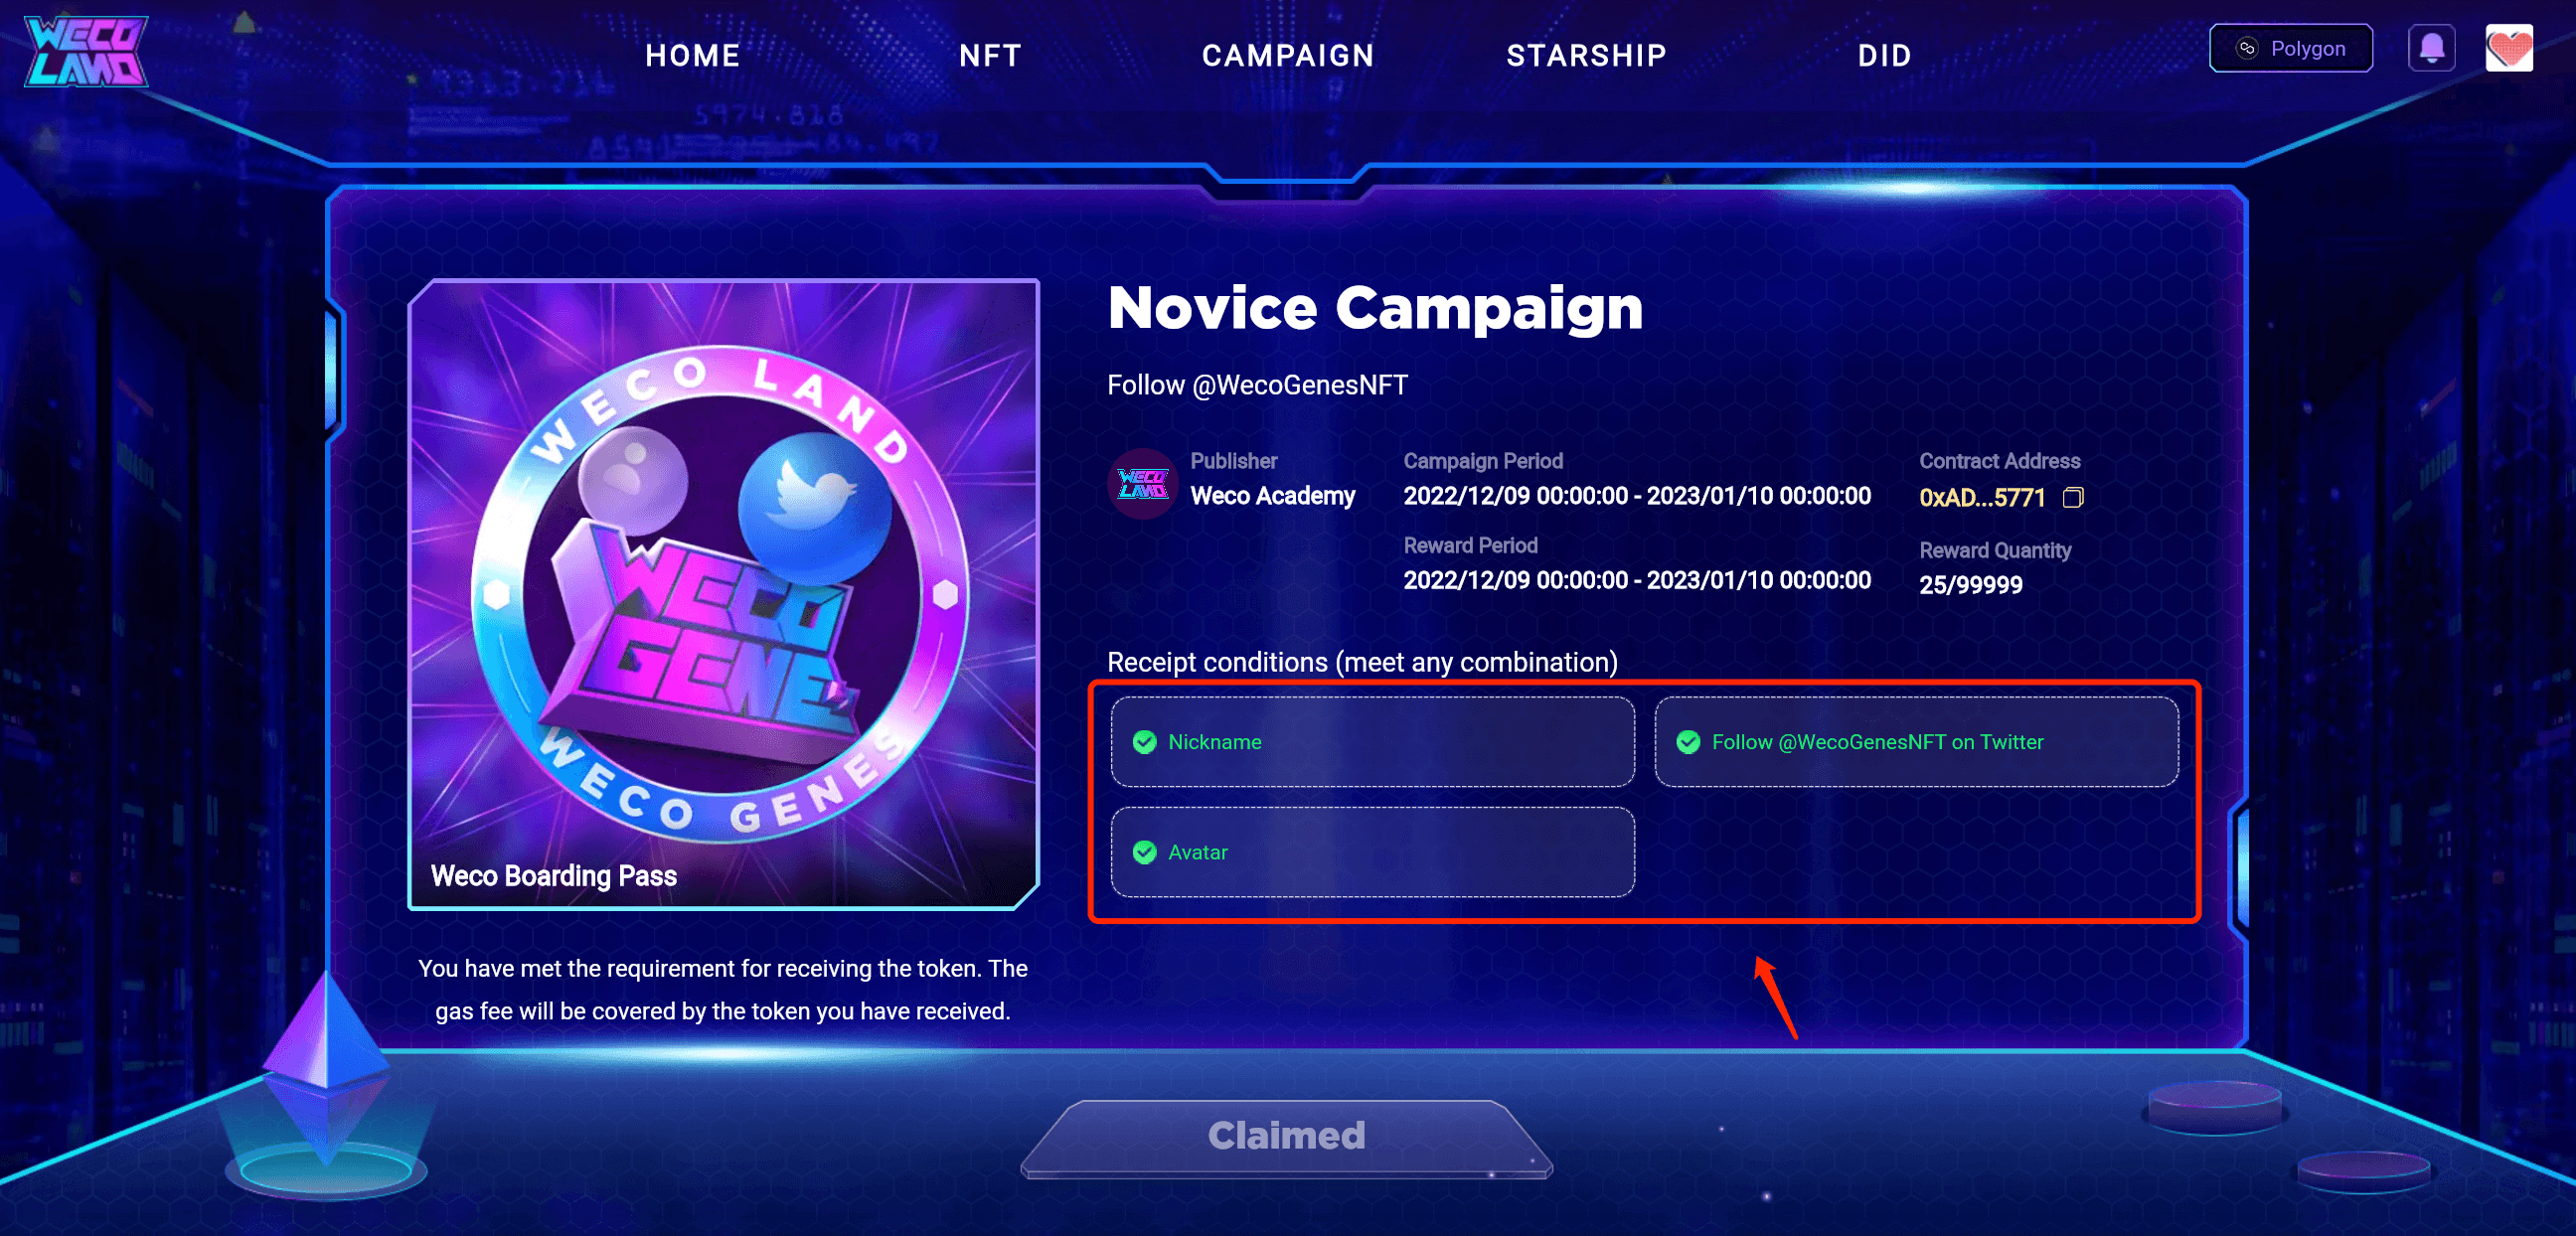
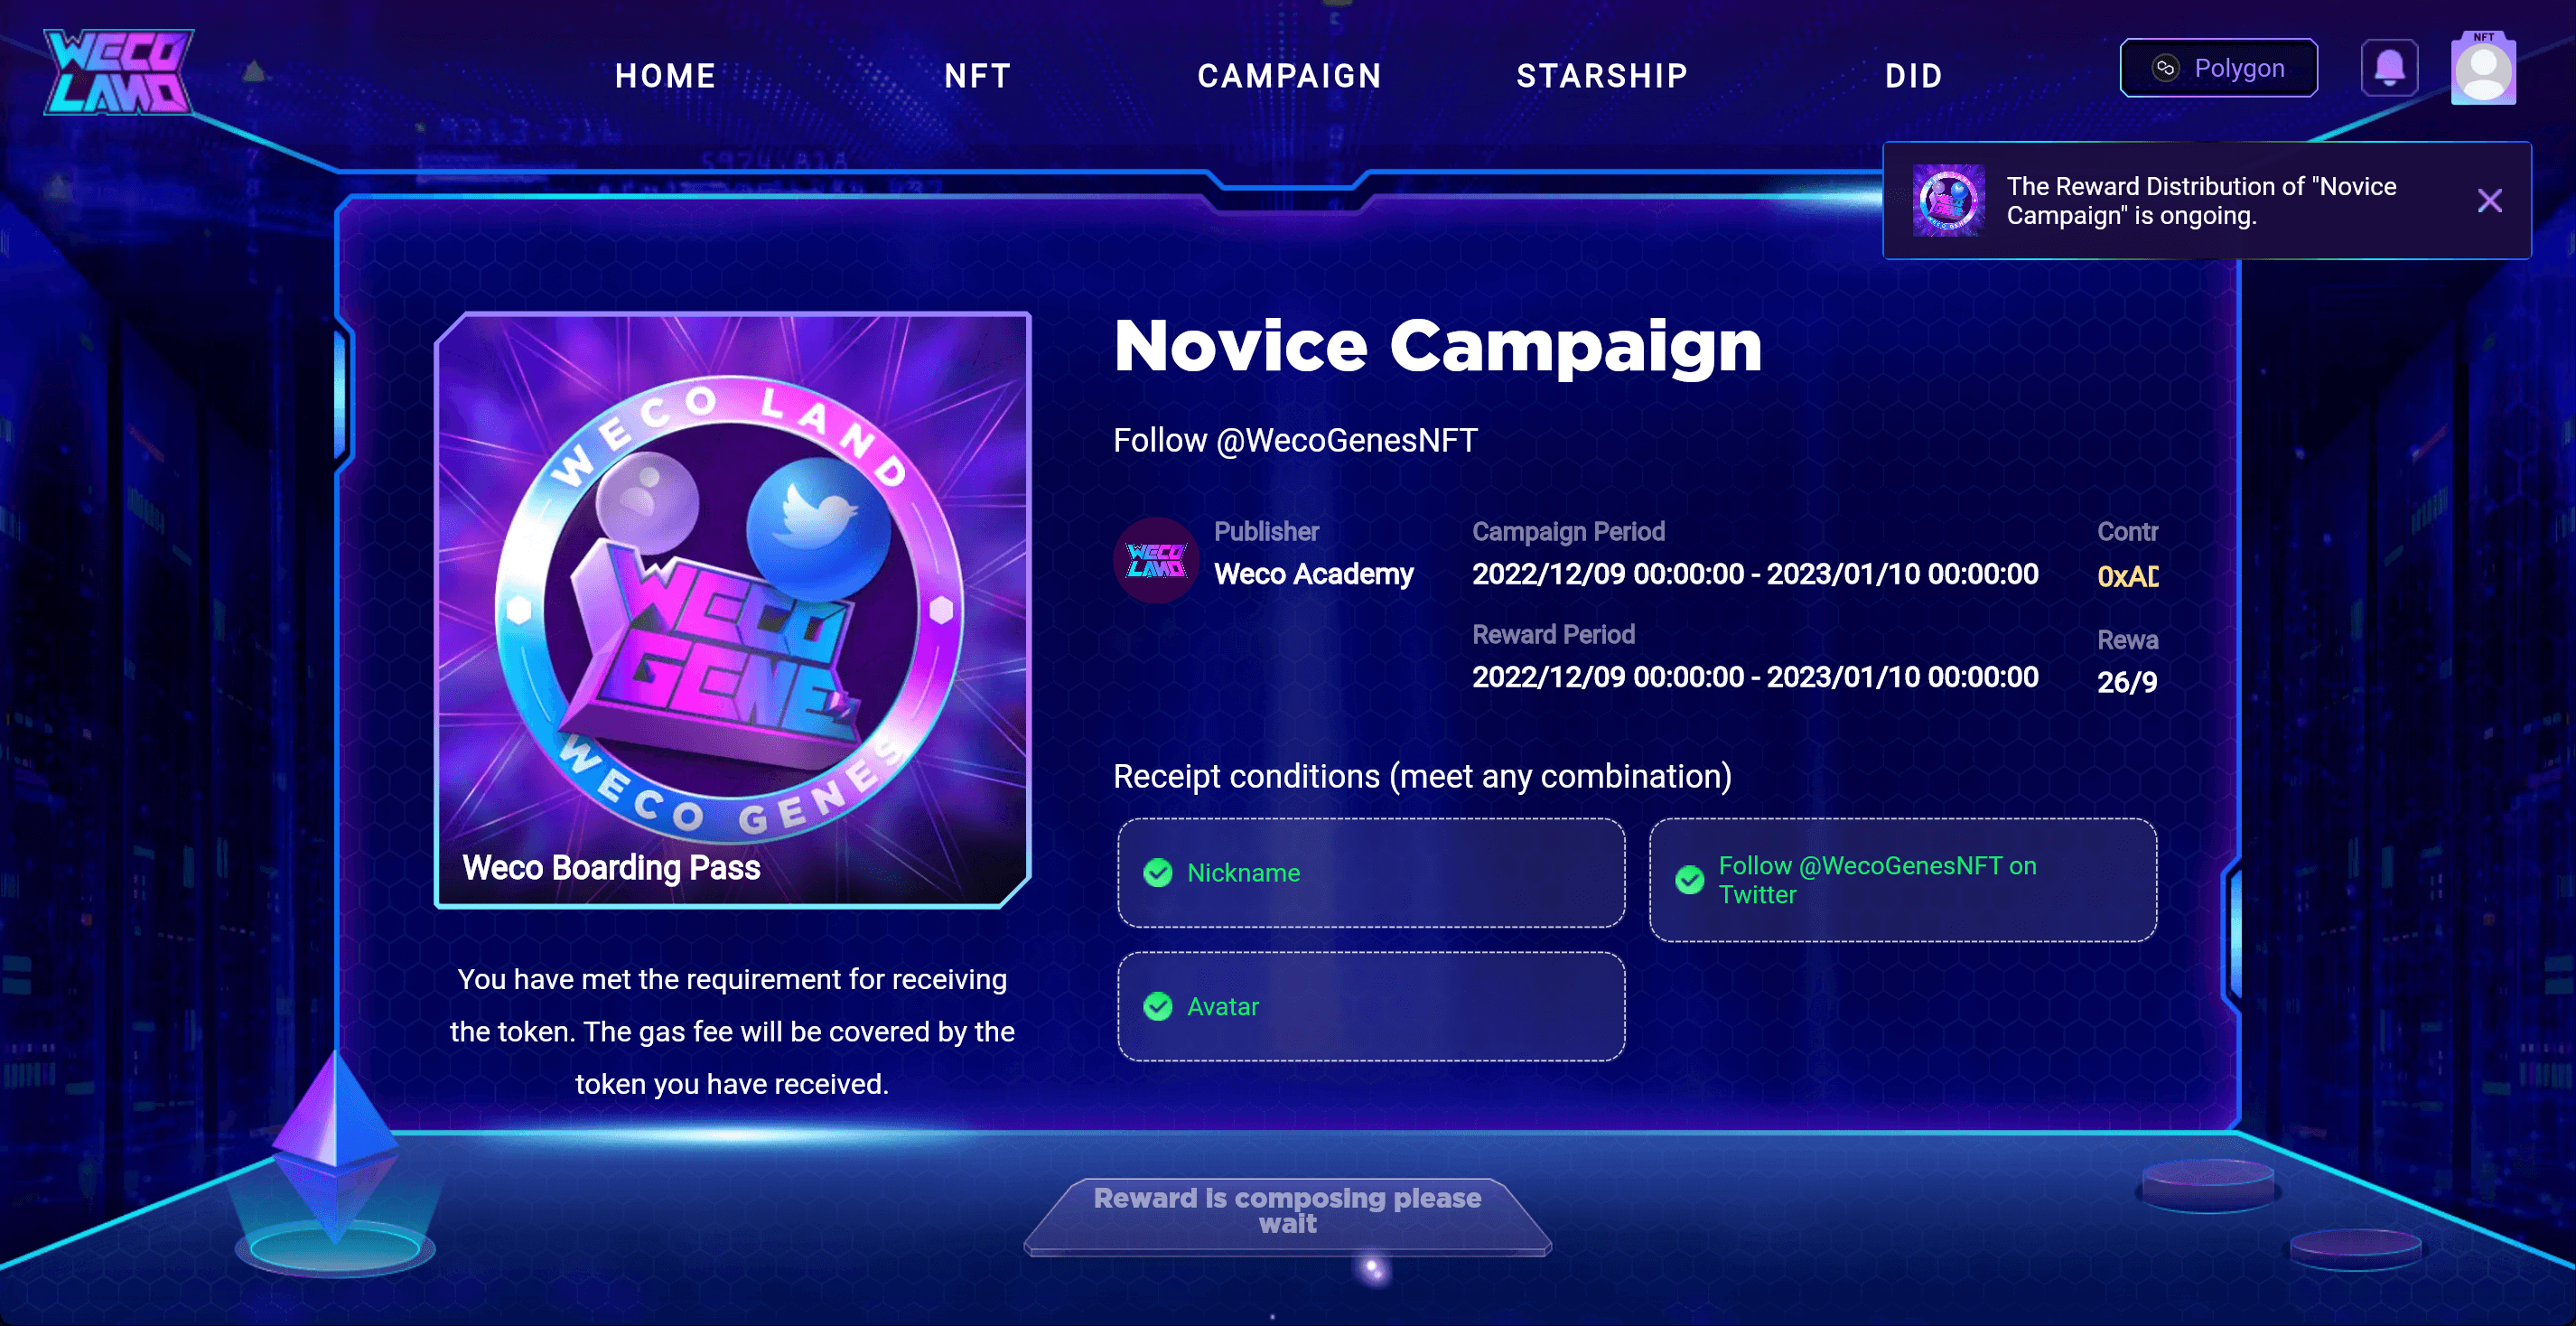
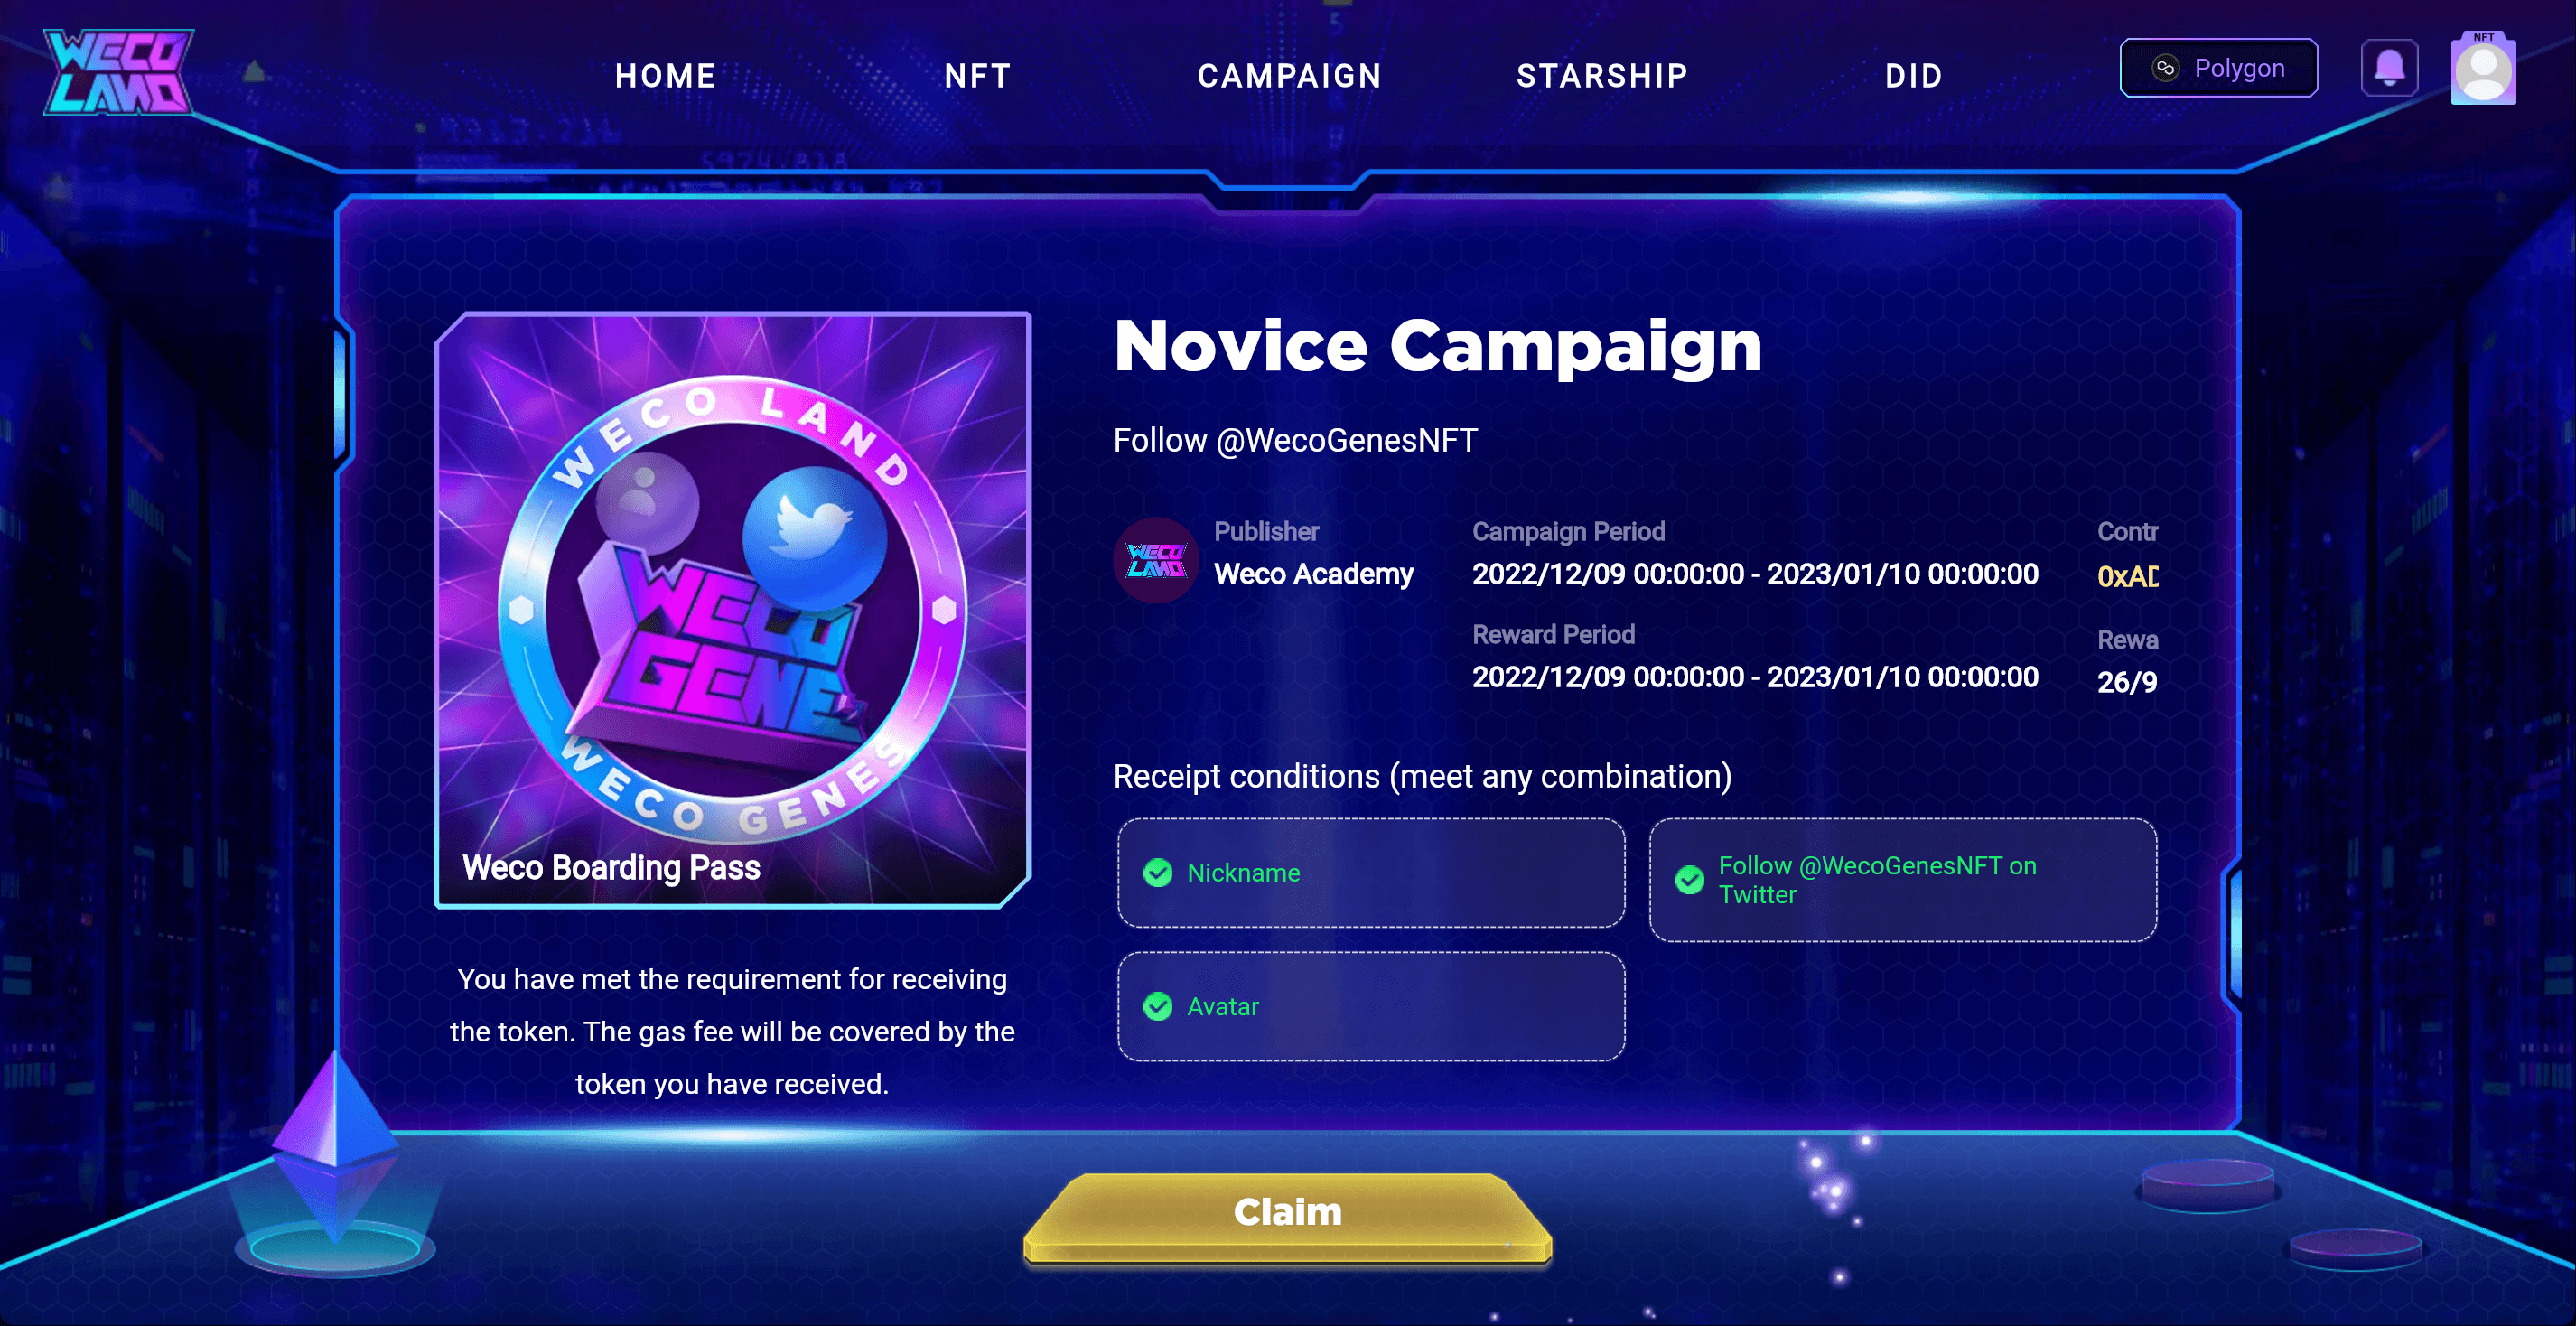
Step 3: Once all the conditions are met then you will be eligible to claim the reward. Don’t hesitate, just click “Claim”.
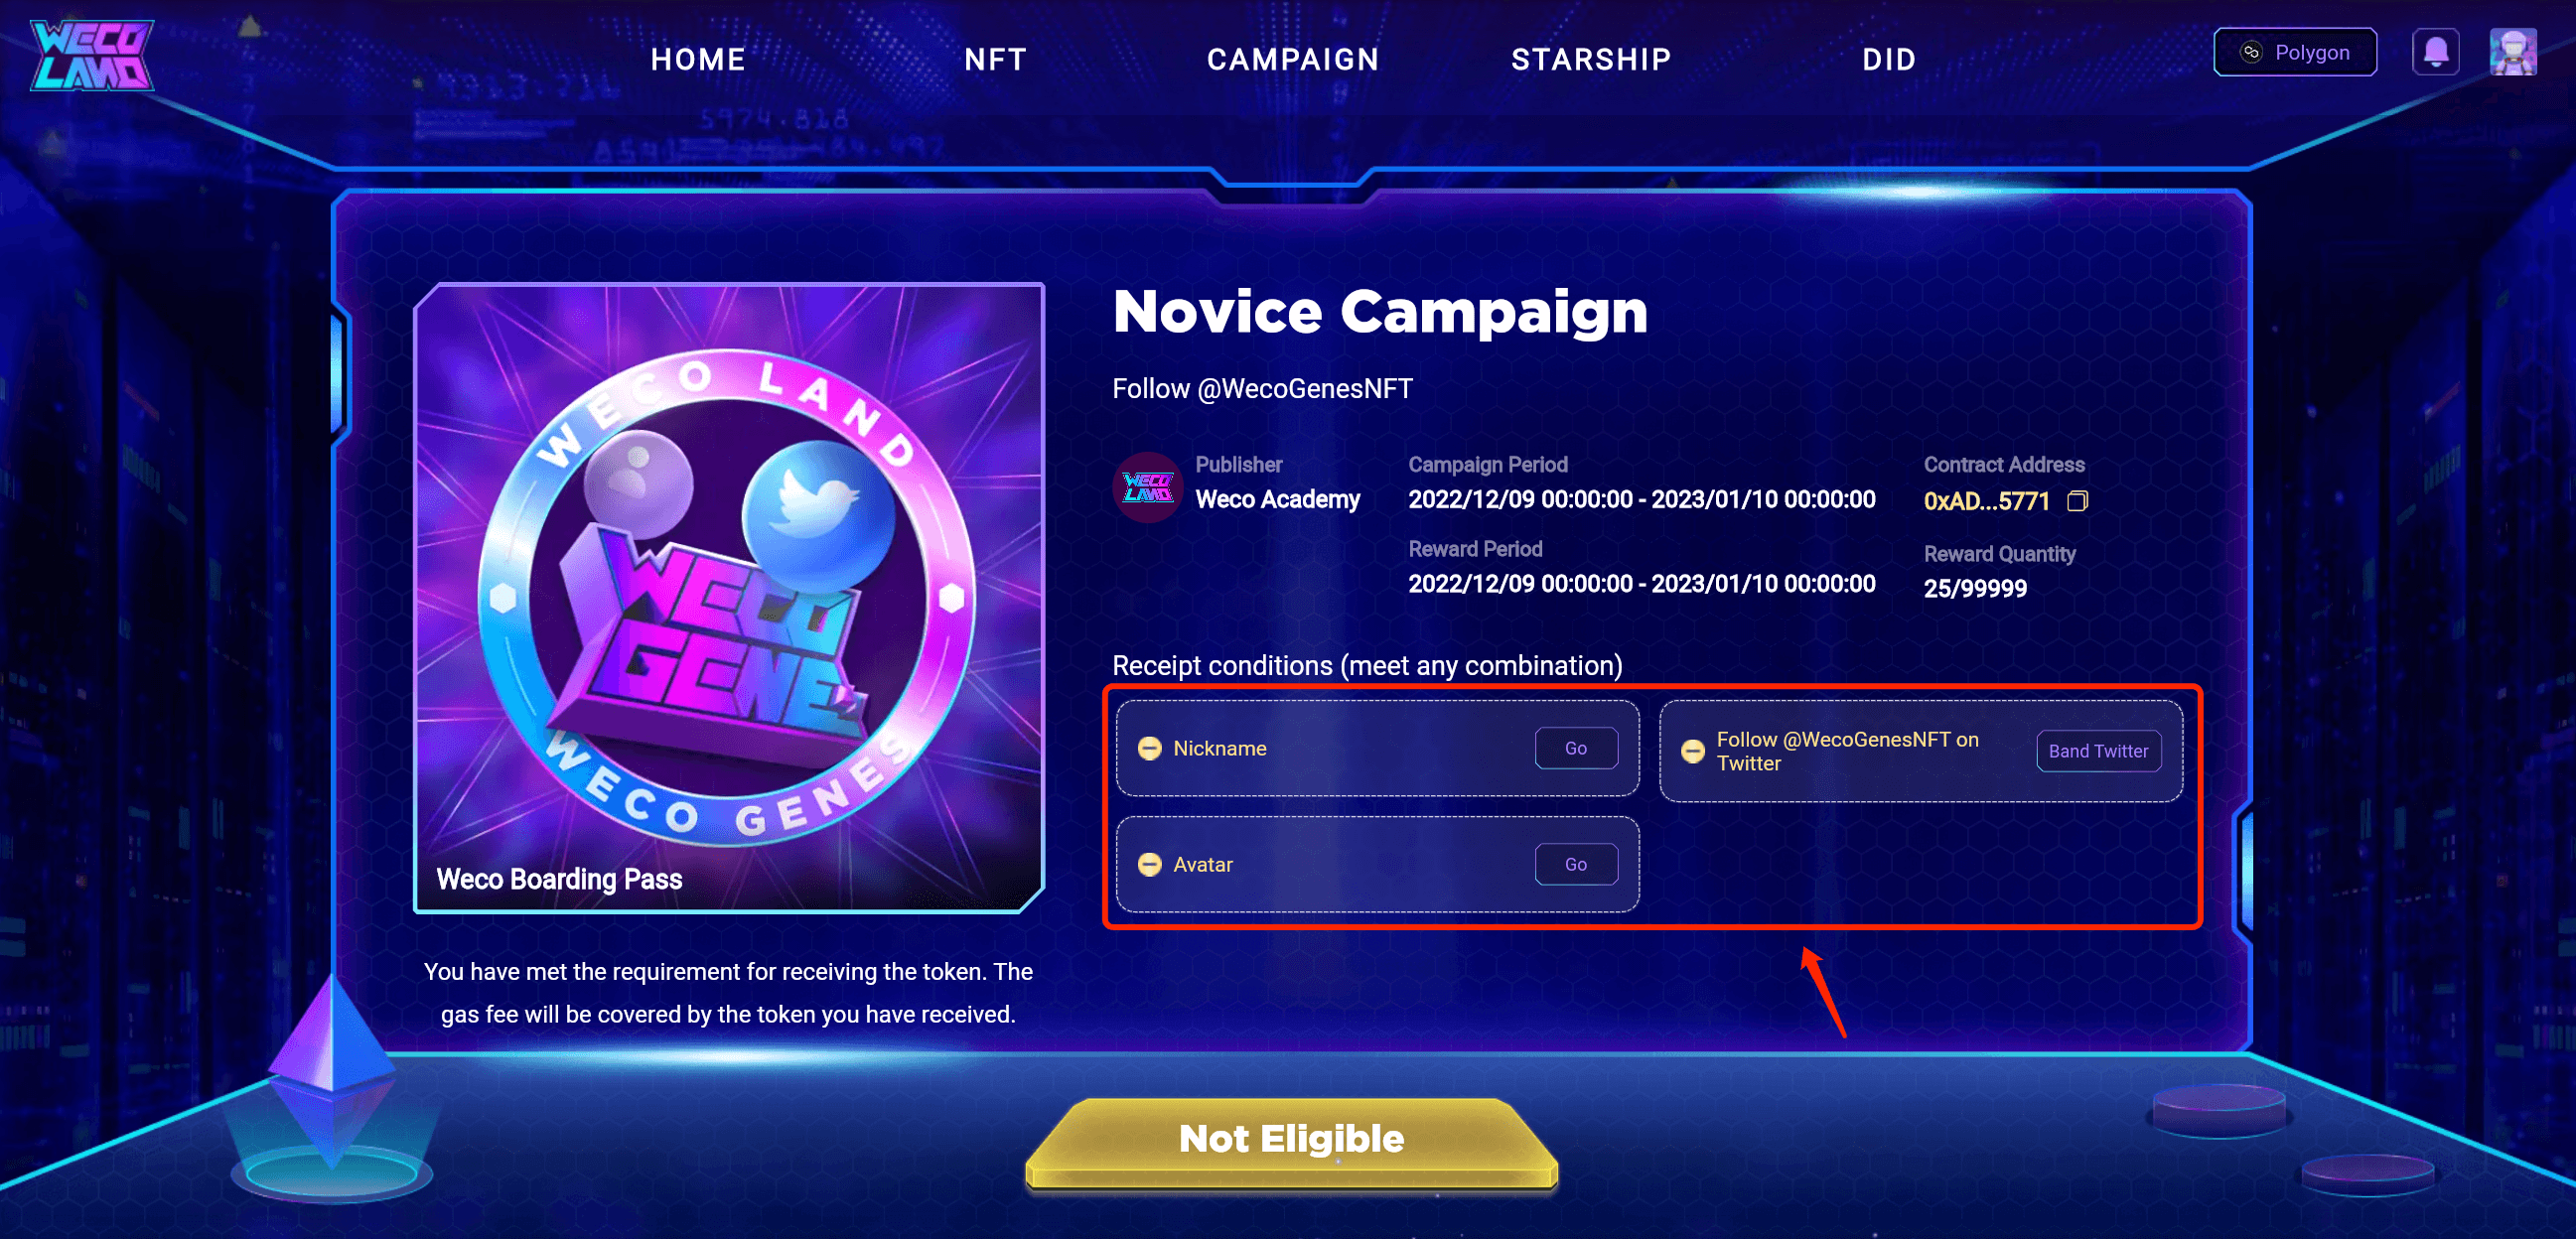
Step 4: After the medal is done composing, then it is claimed and you can find it in your DID.
